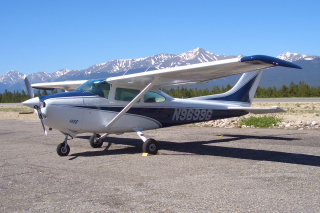
Well, I just got through another aircraft annual on my airplane. This is one of the big yearly items that ends up with unplanned costs. Once again, it cost more than I planned and around $3800, and I did some things to reduce cost. I am starting to think that annuals in my plane will cost around that as long as I am flying it around 120 hours a year. In fairness, the annual inspection was closer to $1200, but fixing and other periodic maintenance added up to maybe $2600.
Expected Items This YearThis year, I expected to do the standard annual plus do the 500 hour service on my magnetos. I also had decided to change my spark plugs with some cheap plugs from
Air Power Inc instead of clean and regap; although in the end, I saved the new plugs for later. I also wanted to fix the battery jump connect which I had recently found to have a problem; this was a simple fix.
500 Hour Magneto Service
This year it was time to look at doing the 500 hour magneto service. I had heard some large numbers from one mechanic for repairing the magnetos. The local mechanic doing my annual said he could repair the magnetos, and it sounded a little cheaper. But I decided to send my magnetos off to Andy Richards in Auburn, CA at
Power Aviation Services. He is relatively new at Power Aviation Services, but he has been doing magnetos for a long time with a great reputation at Sierra Magneto and other places. I have heard good things from people in
Cessna Pilots Association of him. The price was right, he worked on them right away, and explained what needed to be repaired with some possible options. He was very friendly and very professional. I would highly recommend Andy when you need your magnetos done. The average magneto repair is $200 a piece, but was a little more for me. I think this was one place that saved me money.
Unexpected Items This YearI had few unexpected items. I had a cylinder with an exhaust valve leak to fix, a crack in the spinner bulkhead, a carburator heat valve fix, a crack in the baffling, a crack in the cowling near the propeller. These all added up especially the bad exhaust valve and cracked spinner bulkhead.
Bad Exhaust Valve and Cylinder Repair AgainOne big surprise this year was a bad exhaust valve on cylinder #1; this was especially surprising since I fixed it last year. I thought initially that the cylinder shop would cover part of the repair since it was the second time they repaired it. The cylinder shop now says it will not cover it. They believe it had to do with the way I ran the engine although they do not have a clear problem with how I ran it; just minor thoughts. I ran it pretty standard with 75 Rich of Peak, 67% horse power or lower during cruise, and maintaining CHTs below 390 with the use of a
EI UBG-16 engine monitor. I am still trying to figure this out. Most people have indicated the problem was probably the previous repair. Another cylinder shop mentioned that it could be a localized heat problem even if the CHT prove for that cylinder never got above 390 degrees. The 2nd cylinder shop mentioned to look carefully at the baffling. The initial looks at baffling look ok by my A&P. The main thing I want is to not have this occur again.
Cracked Spinner BulkheadThe spinner bulkhead was found to be cracked near the bolts. This is the back part that the spinner bolts onto. It was just a small hairline crack at this point and not obvious. But it could become large and become a real problem. This was looking to be potentially a very expensive repair; maybe $2000 of parts.
The current part had been superceded twice (0752637-1 superceded by 0752637-17 superceded by 0752637-27) and the new part needs extra additional parts (2 of 0550341-1). I found this out by finding the initial part number in a Cessna Parts manual.
Some free Cessna Parts Manual can be found here. I found the new part prices and the superceded information with the
Premier Aircraft On-line Catalog. Through my double checks, I found it a little cheaper than the FBO, but similar.
The initial checks by the FBO did not find the used parts, so I started looking. There is a long salvage yard list on the
Cessna Pilots Association list. I emailed everybody on the list, and I did find one 0752637-17 at
Preferred Airparts who have an
on-line used inventory search, but it needs extra parts. Later, I did find another part for $200 from Faeth Aircraft, but it was too late.
In the end, the best option was to repair the spinner bulkhead.
Cessna Pilots Association informed me of a place that was authorized by the FAA to repair them.
K&K Precision Welding was able to repair the bulkhead for around $400 which included a yellow tag. This repair method saved me about $1400.
Other Repairs the Past 4 YearsI have heard that the first few annuals after buying a plane can be expensive. I think I bought a reasonably well taken care of plane, so I was not sure if the I was going to be hit by this. The initial inspections and maintenance were higher than I expected, but they have not come down too much. Usually around $3000.
Here is a list of some of the items I have fixed in the past 4 years: exhaust repair, other carburator heat repairs, aileron rod repair, new engine mounts, new brake linings, nose strut resealing, new battery, new tires, new ELT battery, new landing lights, overhauling the attitude indicator, fixing the VOR indicator, new baffling, new alternator due to worn mounts, crankshaft seal, and pitot-static checks. All of these items did not cause any serious concerns for immediate airworthiness, but needed to be fixed.
I have also had some improvements I have done which of course add to the yearly costs as well.
SummaryAfter having 4 annuals inspections and maintenance that have been around $2500-$4000, I think I will start planning on at least $3000. If it ends up less, I will count myself lucky. It is easier to have it work in this direction than the other.
Cessna Pilots Association and taking
Mike Busch's Savvy Aviator Seminar definitely helped me keep my costs down. It could have been much worse. I would also recommend both of these items for owners.
/Brian

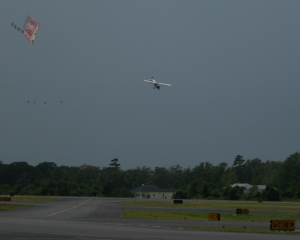
 Image from KTVB article: Courtesy Walt Smith.
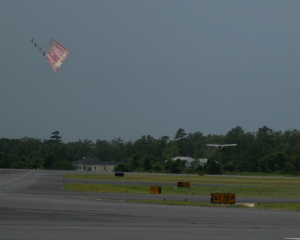


 Summary


 Inside the teepees is a little rustic, but quite nice for a teepee. The beds are on wooden platforms to raise it off the ground. There are lamps, tables, and heated blankets for the bed. It rained pretty hard in the morning, and the insides of the teepee got a tiny bit wet, but not bad.

 Classic Air Ventures
 It ends up being in a very remote area of the country and great for camping.


