Monday, November 18, 2013

Jackson Hole Hoback Canyon

Last time I went to Jackson Hole, I went by a slightly new path.  It was a pretty good one and I found some points to plug into the GPS to make it easier.  The route follows what I have heard is called Hoback Canyon.

I have had a number of people ask me about getting to Jackson Hole, Wyoming and the Tetons.  So I thought I would write about this path.  If you are ever thinking about this trip, I highly recommend it.  I have talked about it on a number of blog posts.  My Teton Flying Trip in 2009 was the last time I wrote about it.

Hoback Canyon Route

The route is:
KPNA TUVOC JAGIL ZUGEN KJAC


Here are some altitudes of interest that I looked up:
The Jackson Hole Airport KJAC is at at 6451' MSL.
The Bottom of the canyon is about 6500' MSL, and there looks to be about a 2.5 mile width at about 8000'.
The floor between KPNA and TUVOC is about 8000' MSL and you want to fly a decent altitude above that.

There are lots of big mountains around, so pick an altitude that is best for you, your plane, the winds, and the weather.

The East Route

Here is a route from the east which is also a nice route.
RIW KDUB DNW KJAC

This route has a higher pass which you need to clear with common Mountain Flying practices in mind.

Mountain Flying Principles

Here is one page that talks about some mountain flying principles.  I have his book and try to grab every book I can find on Mountain Flying and get instruction and thoughts from people whenever I can.

When to Fly

I have always flown up to Jackson and the Tetons in the summer.  This prevents any worry about snow storms or how to keep my plane out of the weather.  Spring or Fall could be ok too, but it does get colder than you think in the Tetons in the Spring/Fall.  That has been my recommendation for people.

Flying into a ski town for skiing sounds like fun, but I have never done it.  I think it is safer to drive unless you get lucky with the perfect weather, especially if you are considering staying overnight.


/Brian

Thursday, December 23, 2010

Night Flying

My wife twisted my arm to get night current again. She wanted to try looking at Xmas lights from the air. So it was time to go out night flying in our airplane, our Cessna 182.

A couple years ago I had fun getting more night time for my commercial certificate. It happened during the Christmas time, and it was fun looking at Xmas lights. Night flying is pretty cool with air being calm (usually), less crowded airspace, and things being very pretty with lights.

So this night currency made me think that I should make a list of things to think about when getting night current again. Or maybe it can be things people think about when they are new to it. This is not a full list, but are things that came to mind that I like while I was flying last night.

Day(s) before: Night Flying
  • Check all lights before the flight if possible; so they could be fixed: interior panel lights and exterior lights.
  • Find good flashlights to bring for inside cockpit. More than one.
  • Bring approach plates if IFR rated. Review IFR refresher notes.
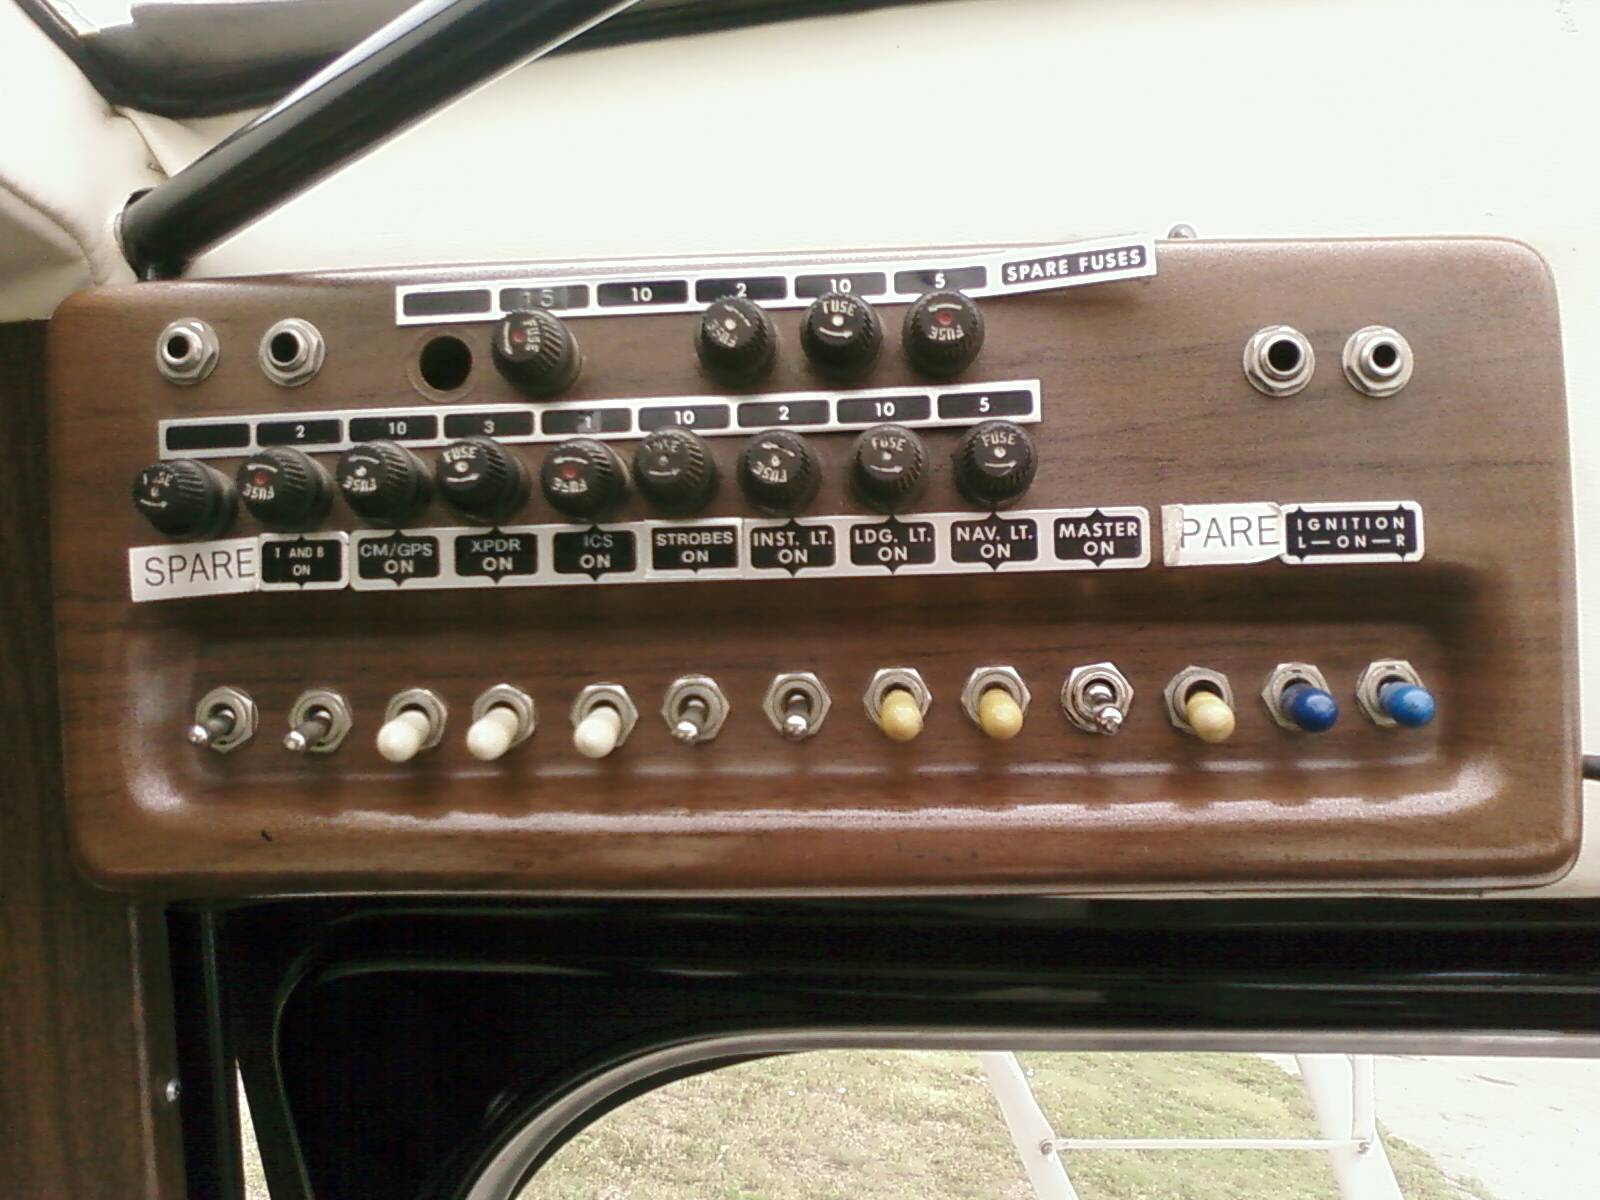
  • Have inside organized and thought out. It will be harder to find all the controls in the dark and better to know where everything is with using the flashlight minimally. Maybe take a picture of the inside of your airplane and think it through; here is a picture of my inside panel, but every plane is a bit different.
  • Know where heat and other controls are for passenger comfort. It will be colder.
  • Think ahead where you will be flying; know altitudes; know obstructions/towers; know freqs. It is way easier on the ground in the daylight to think about this.
  • Remember FAA regulations for nighttime currency. (Night is 1 hour after sunset, 1 hour before sunrise; Need 3 full stop landing and takeoffs within 90 days; Nav lights need to be on from sunset to sunrise).
  • Know how to turn lights on at airports you will be going to. Usually 3,5,or 7 clicks on mike.
  • Have a handheld radio if possible at least to turn on runway lights in an electrical emergency.


Taxi: Night Flying
  • Do IFR taxi checks even if not IFR rated (airspeed correct, AI flat and zeroed out, Altimeter correct, Turn Coordinator turning, DG adjusted and not precessing, VSI at or near zero)
  • Turn on your navigation lights; check and remember where the switches are.
  • Click on the airport runway/taxi lights.
  • Taxi light use only now.
  • Use the taxi center lines. It is hard to tell correct spacing to parked planes. Be real cautious of wingtips and any other planes/buildings.
  • Notice color of airport lights and where to go. Blue is taxi, white is runway edges.
  • Exit the runway onto the taxiway watching for path between two parallel rows of blue lights
  • Practice taxi backs instead of just stop&goes. That needs practice and you will feel better with the practice. Also, it gives you the entire runway for takeoff.

Takeoff: Night Flying
  • Normal Takeoff stuff
  • Landing light on
  • Look outside but also use AI, DG, airspeed when departing upwind. (As you take off you are pointing high, the runway lights are behind you and likely will not have much horizon to see. My wife commented last night about this. It is disorienting if you are not prepared.)
  • Climb near Vy, but not below.

Cruise: Night Flying
  • Beautiful and smooth flying usually. Lots to look at, but always be the pilot and not just site seeing.
  • Normal Cruise stuff: LCGUMPS and other mnemonics
  • Landing light off? Maybe keep Taxi light for extra visibility. Definitely all other lights.
  • Watch for planes. Edges of eye is best.
  • Watch engine gauges. It will feel better to know your plane is operating well. (It is strange, but psychologically the engine will sound different at night. You hear every change in tone in the engine sounds. )
  • Remember to check Voltage or Amp gauge. Very important at night since you need lights.
  • GPS helps tremendously but be prepared if it goes out.
  • Know where you are on a map and relation to roads/cities.
  • Always guess where you think the airport is.
  • Turn on the runway lights and see if you are right.

Landing: Night Flying
  • Normal landing stuff including LCGUMPS
  • Turn on appropriate lights including landing light.
  • Be prepared to turn the airport lights back on if it has been a while since you first activated them or click them again just to be safe they will stay on.
  • Remember the runway edge lights are a little above the ground and remember not to flare to early or late.
  • Use glide slope (right on preferably, never on low side.) It is harder to judge the right angle at night, so a VASI glide slope indication helps a lot.
  • Make your approach perfect. I like turning final about 400' above the field.
  • Flaring at night can be challenging, so I like to use an approach similar to a float plane glassy water landing. I have read about it, but not actually done a real float plane landing yet. I dream of getting a seaplane rating. But the glassy water landing sounds good and I read somebody else did it too. They do it when it is difficult to see where water level is
  • Land with some power
  • Land with appropriate airspeed, not to fast or slow. Too fast or too slow will make flare harder.
  • Land with flaps so you are slow and pointing down more on approach
  • Level out parallel with the ground when getting close to landing.
  • Nose higher as you get close to landing but leave some power until main wheels touch
  • Pull power when the main wheels are on the ground
  • Basically a soft field landing too. Don't bother with the short field unless you are a confident night flier. Longer runways are your friend at night.

General Nighttime Flying tips
Know where your hills and antennas are. Avoid them. Leave the mountains for the daytime. Bright moon can help make things easier and more comfortable; it will light up the ground a bit. Also, stay near roads, cities, and lit up areas. Night time flying in dark areas counts as actual IFR, so stay away from that unless IFR rated.

Get some IFR training if you don't have it. It will help in general and be good for unexpected entry into clouds or dark areas

I found these other websites with some other good tips:
http://www.aopa.org/asf/hotspot/articles/5079.html
http://www.avweb.com/news/airman/190849-1.html

Pictures

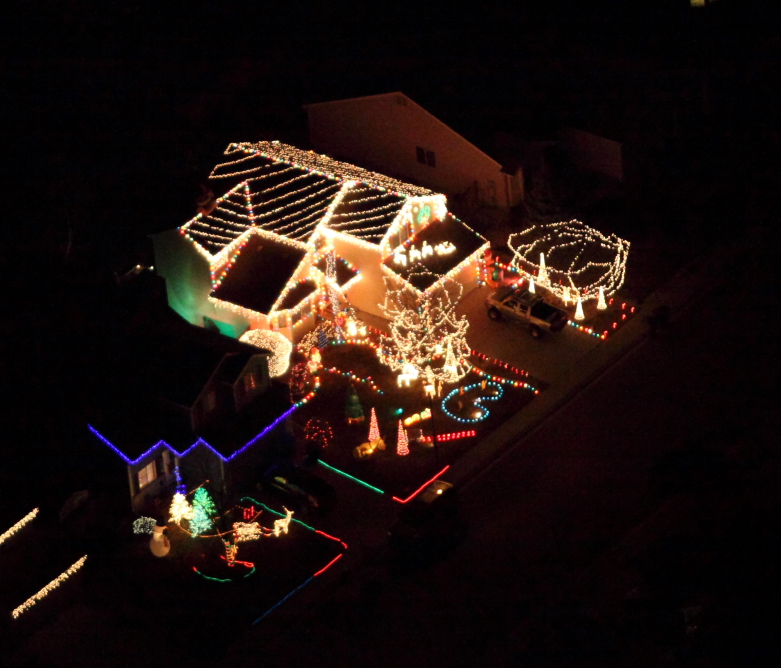
So I went up two nights ago to get current again and had fun with both the practice and the site seeing. Then again last night. I found an awesome house from the air and then went and found it on the ground. I never would have found it otherwise. Go check out your area for houses; it is fun!

Xmas House Lights Aerial

We got lots of other pictures too..

Denver Xmas Lights Aerial
Downtown Denver with the baseball field at the bottom. It is surprising how the skyscrapers blend in with everything. It is very pretty and hard to capture in pictures.

Denver City Building Xmas Lights Aerial Our Denver City and County building is lit up at Christmas time. Very pretty as well.

Summary

Go out and have fun, but be careful. If you are nervous at all or are learning, take an instructor. Most instructors love night flights.

/Brian

Wednesday, September 8, 2010

Update on things

Hello everybody!

I am still hear and still love your e-mails. I just been having problems thinking up a good new topic. My favorite thing to do is to emphasize a great topic that might have a lot of interest.

So let me think and ramble here a bit. I have been flying. I typically fly around 100 hours a year. These days it is for our Colorado Aerial Photography business or it is for a long trip where we are usually also trying to get some good photography at the same time. We didn't end up having a flying trip this summer, bummer! It just didn't happen, not sure why.

Colorado Aerial Photography has been a lot of fun. It is a lot more work than it might first seem. I am glad that my wife is making it her full-time work, but I am very happy to help out on the side where I can usually as a pilot or brainstorming. Taking high quality pictures with a high quality camera/lenses while the plane is bumping around in turbulence can often be a challenge. We have had some interesting things to circle and take pictures such as a dynamite plant, a prison, and a bunch of other things. We even helped out with a promotion to try to get Google to come to Longmont for high speed internet. Here is the local newspaper article about Longmont Loves Google. You certainly go concentrate and circle on areas that you never would otherwise. And there is a lot of time and energy that has to be put into the business other than flying and taking pictures. But this blog isn't about the Aerial Photography. It is just an update...

We just had our local air show, the Rocky Mountain Regional Fly-in. It was a great time and I had the opportunity to take a father/son on their first ride in a small airplane and we arrived at the show by plane. A big hit with them. Even though the son was a bit quiet, his dad told me that he really, really enjoyed. He is a super airplane nut. The most exciting things to me was the F16, F18, and the Team Chaos Jet Truck with pyrotechnics. I have never seen anything like the jet truck before. Oh.. on the ground they had a MV-22 Osprey parked that you could walk around and inside.

I just had my annual. This I think will be the cheapest annual since I owned the plane. Nothing major was found. Just a few small cowling fixes; loose rivets, etc. So I think the bill will come in around $1500; probably a bit more.

Another interesting, but sad thing to watch is the Four Mile Fire. We live pretty near it and saw it blow up right at the beginning. Before getting a bagel, nothing. After a bagel, big huge cloud. One of the biggest I have seen from a fire. I didn't get a picture, but it looked about like this picture within a 1/2 hour of it starting. If you check out the stuff on the internet, it shows it pretty well. We had huge 30-50 mph winds and it went from 0 -> 3000 acres -> 6500 acres super quick. Luckily, it has not continued to grow, and it rained today.

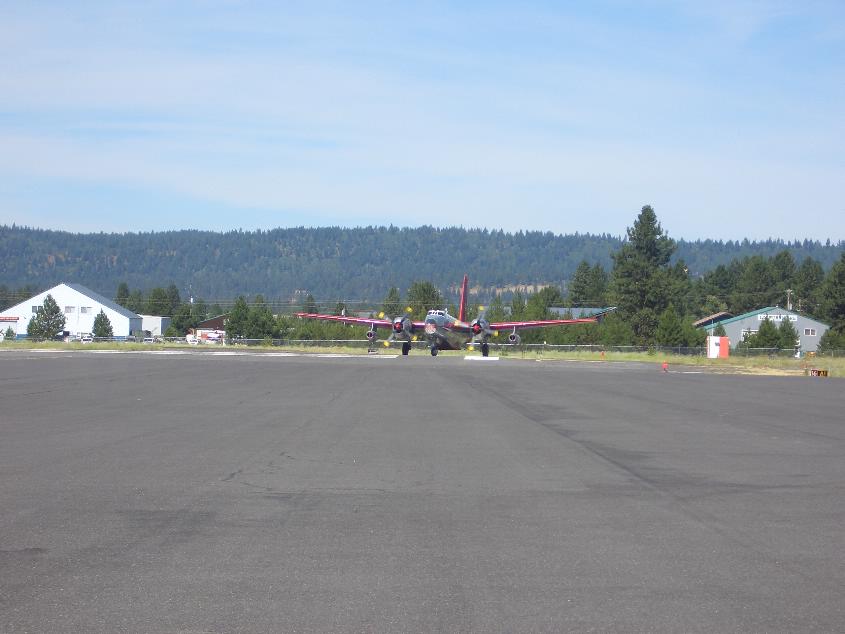
The air tankers are amazing to watch. There is one in particular that facinates me. Here is a link to Air tanker 45 pictures on Airliners.net. It is a Lockheed Neptune P2H and the strange part about it is that it has 2 3,500-hp Write R-3350-32 Radial engines and 2 3,400-lb thrust Westinghouse J34-WE-36 auxillary jets. Now it looks like Tanker 45 has the jets, but they are not in use. Pretty strange. If you look at other Neptune P2 planes, you will see some in operation. And I am pretty sure I saw one in Idaho and heard the auxillary jets spinning up. I have a picture of Tanker 44 in my Idaho pictures from my McCall Mountain/Canyon Flying Seminar experience.

So I guess not much has happened in some ways, but maybe a bit has happened in others. Maybe I should have split up the above into separate blogs... Oh well. If you have any specific ideas or questions, please E-mail me . I am still here.

/Brian

Thursday, April 29, 2010

IFR pictures

It is that rare time of year for us in Colorado to get good small plane IFR practice. It seems crazy that somebody would want to go into the clouds for fun, but that is what I do this time of year. It has been cloudy this past week and I have gone flying twice.... for fun in the clouds (or soup as many call it).

IFR picture

This golden time seems to happen around April/May in the spring and September/October in the fall for Colorado. The problem is getting clouds that are not below freezing at low altitudes and do not have thunderstorms. In the winter, we get clouds sometimes, but the freezing level is at the ground. In the summer, the clouds are either at 20,000' or they are thunderstorms. So now is the time of year to look at my IFR refresher notes.

I have used my IFR on many past cross country trips especially to California due to the coastal marine layer, and I want to feel comfortable. One way to feel comfortable is to get some hood time with a safety pilot, but it is not the same. Flying with an IFR flight plan or with flight following is good to feel comfortable with the radios. But nothing is as good as getting real time in the clouds. So, I like to get practice in the real thing as much as I can doing the approaches I am familiar with. This way I am not nervous about approaches while getting comfortable with the clouds again. Then when I do approaches I am not familiar with and in the clouds, there is less new items.

I really like the real thing. It is a bit different. Hoods are a pain; they sometimes mess up my vision since something is right next to my eyes, and most are cumbersome. See my review on IFR hoods I have used for my preferences.

Entering the Clouds

So what is it like. For some reason, entering the clouds is a little different than my insides think it should feel. When you go into a cloud, it is not at all like going into a cotton ball. There is almost no perceptable change in flight. Sometimes there is a little more turbulence in certain areas of the cloud, but many times not. For me, it is kind of like when you are driving a car and you enter the fog. Or if you have ever been driving in the mountains and a cloud has passed over the road.

In the clouds

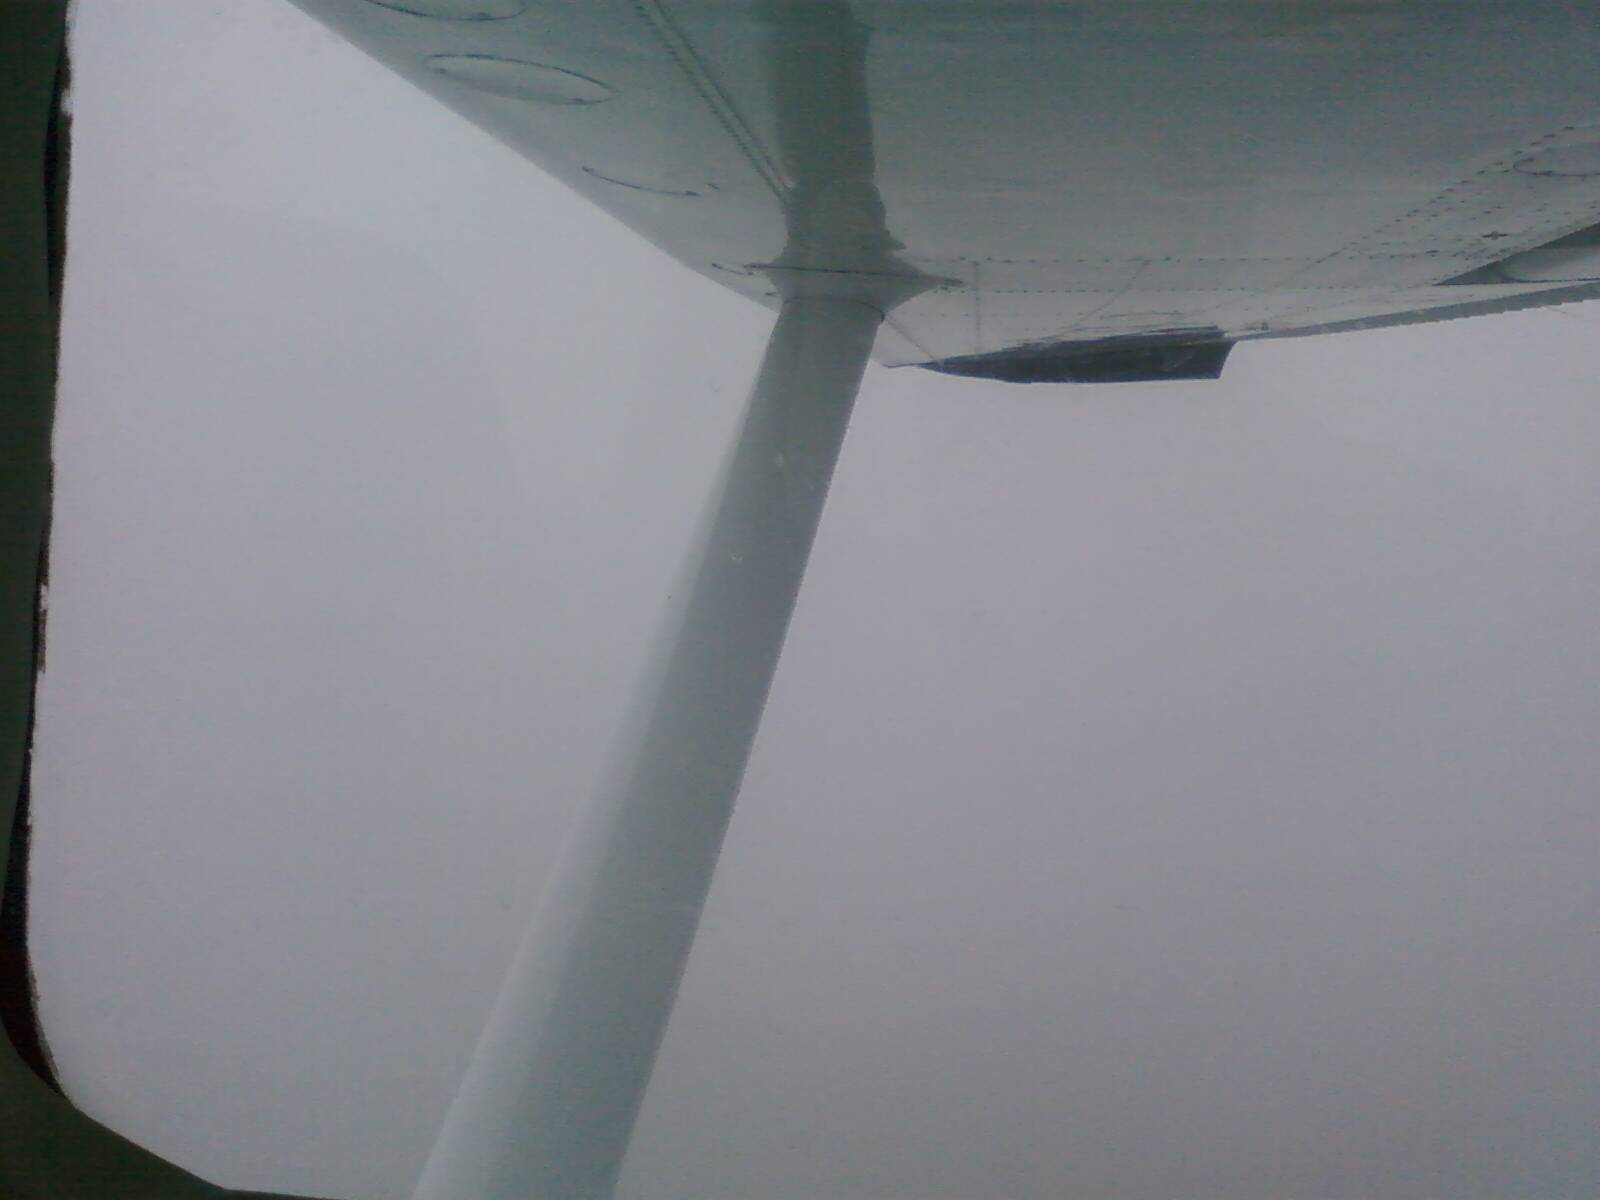
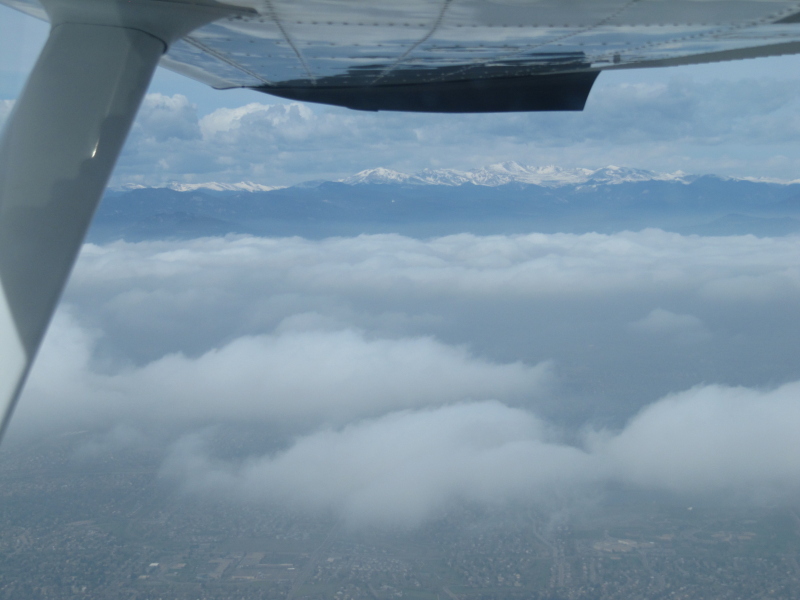
Inside the clouds it is often like being in a very dense fog again. You can see your wing tips, but not much further. Look at the top picture. You often have moisture on the windshield or wings. If you are near or below freezing levels, make sure that moisture is not icing.

Sometimes the cloud has some definition inside instead of just being white. This can mess with your senses. If you see any sort of line, your mind wants it to be the horizon. This is a good time to keep the good scan going and double check your backup instruments and make sure you are not correcting in the wrong way.

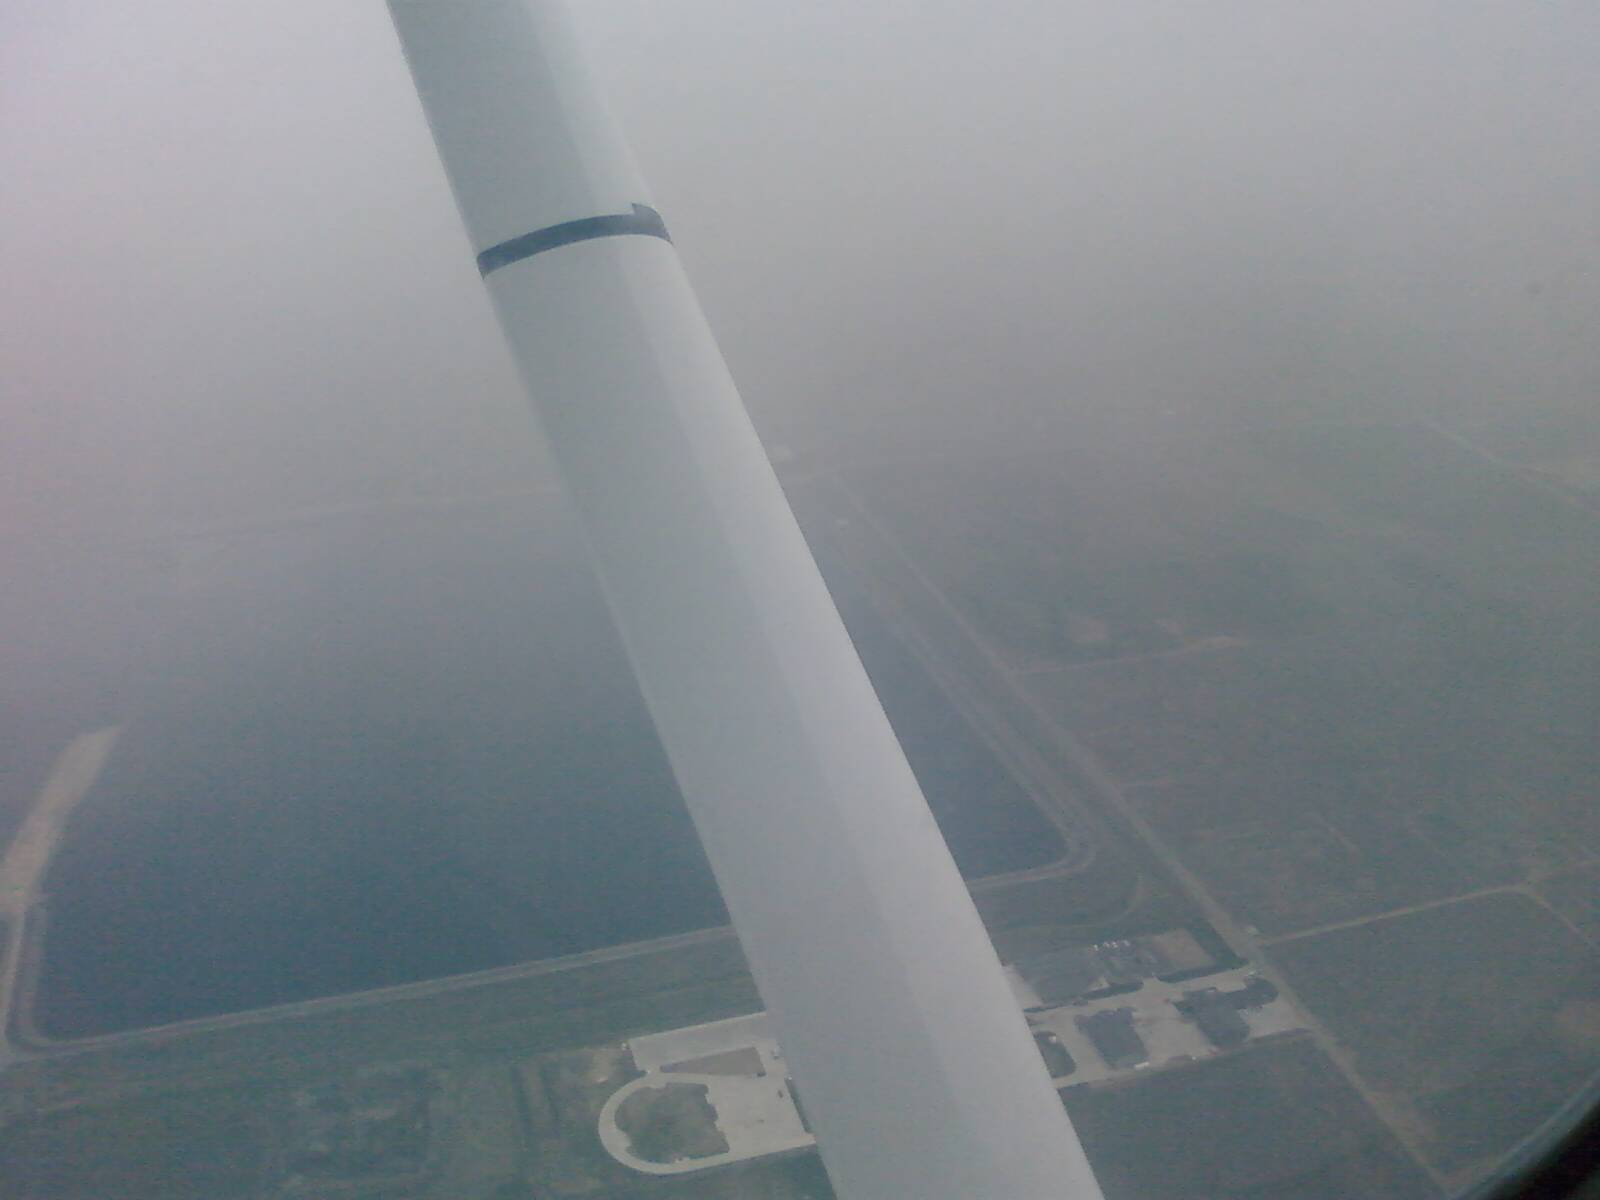
Looking down sometimes you see more than looking forward over the nose, but beware in this case. If you are looking down, you are not looking at your guages and you don't have a horizon, so you can end up in a turn or other unusual attitude. An unusual attitude would especially be bad on an approach and this is when you might likely see more looking down rather than over the nose. If you have a real missed approach you are pretty close to the ground.

IFR looking down

Above the clouds or between clouds

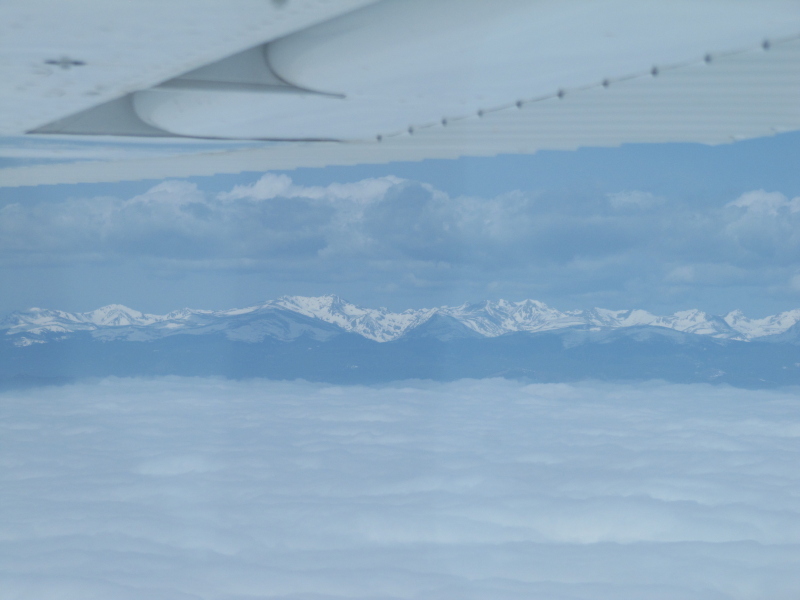
Getting above the clouds can be very pretty, and the passengers really like it too. While getting my cloud practice, I try to get altitudes where I stay in the clouds, but sometimes you don't have a choice.

But sometimes it is not all bad:
IFR above the clouds picture

And then sometimes the clouds start breaking up in one area, so it is time to try another airport that might still have clouds.
IFR scattered clouds picture

Going back into the clouds

Sometimes it feels strange for me going back into the clouds after being above the clouds. It feels like I am flying into the ground which would not be a good thing. So I pick this as another cue to check everything well: on the approach, keep the scan going, needles lined up, altitude good and what was that MDA again.

The Illusions

Of course remember that there are illusions your body is feeling. You may not notice it completely when under the hood. Just slight views of the ground can prevent the full effect. Accelerating feels like climbing. Slowing down feels like descending. A turn with a little Gs probably feels like a slight climb too. A missed approach where you are climbing, turning, and accelerating will feel like you are going to the moon. Watch the airspeed and keep the scan of instruments going well. Your body tells you one thing and you have to ignore it. Double check the backup instruments instead of believing your body.

Turbulence of course messes up your body when there is no horizon. Trust the instruments.

Miscellaneous

I really like flying with a GPS. If you have your course plotted in and flying the magenta line as well as the needles, there are lots of clues to indicate you are turning. I imagine a glass panel is nice for the same reason a GPS is nice, but even better. Maybe someday I can get one of those Aspen Avionics devices some day.

Summary

As I write this, a few days have past, and now it is snowing again. Well, usually April/May is a mixed back, but there should still be a lot more good, safe IFR days left.

/Brian

Wednesday, April 7, 2010

California Flying Trip 2010

I just got back from our yearly spring break trek to California from Colorado. It has been a fun destination for us in the past in 2006 to San Diego, 2007 to Carlsbad, 2009 to Disneyland. And it was fun again this year both for the flying route and the visiting in San Diego.

Below is my track on this year's California trek using the method I described in a past block entry using my Spot Satellite messager. The route between KHII and KCRQ is missing below, but I will describe it further below.


The flying back and forth was similar to past years. It seems we typically have good weather on the way out, and then have weather to divert around on the way back. The one difference this year was that the marine cloud layer in San Diego was not around on departure or arrival, so IFR was not required. If we had arrived or left on any other days, we would have had the clouds, but not on our days.

We break our path each direction into three pieces. Two pieces done in the first day, and then we leave the last short piece for second day.

Getting there: Day 1

Starting off, we had to wait a day before leaving due to weather. But this worked out. We had an extra day to get ready and plan. The weather also left behind a nice blanketing of snow on the mountains for our route. Very pretty!

Our starting path between Longmont, CO and Page, AZ was roughly by klmo-dobee-funds-kege-kpga and weaving over Rollins Pass and through valleys and over Vail Pass. Along the way we looked at Breckenridge, Copper, Vail, and Beaver Creek ski areas.

Page, AZ (KPGA) is a great place for a inexpensive fuel stop and picnic lunch. The view on the approach over either Lake Powell or Grand Canyon are incredible. The view from the ramp is pretty nice too.

Page Arizona Airport Ramp

Our next path from Page, AZ to Lake Havasu, AZ was roughly by kpga-kgcn-khii and following some of the Grand Canyon cooridors as described in my earlier post.

In more detail, I went from kpga to Zuni north, Dragon north, Dragon south to khii. I went ahead and made waypoints in my GPS and followed that flight path. I also watched my altitudes so that I am in compliance with the needed altitudes in the Grand Canyon area. Basically 8500' initially, and then up to 10,500' when got closer to the Zuni North Corridor point. See the Grand Canyon chart on-line at skyvector.com and click the Grand Canyon VFR button.

Desert Skies FBO in Lake Havasu (KHII) was very helpful and had a wonderful free slushy machine. We stayed at the Travelodge at Lake Havasu; it was ok. We heard that the Desert Skies FBO had a deal on the Hampton Inn for $89 and we might try that next time. We found a nice beach/park area to park and walk around near the London Bridge; this part is worth looking around more next time.

London Bridge at night

Getting there: Day 2

For getting in and out of the San Diego area and just in case of a marine layer, I filed IFR. I received the following clearance: khii-tnp-v208-ocn-kcrq. In the end, I did not have to go to OCN and flew this route: khii-tnp-trm-jli-escon-kcrq. The Western Flight Services FBO at Carlsbad/Palomar Airport (KCRQ) greeted us and was very helpful and nice. We selected KCRQ since they had the best deal on rental cars ($33/day) and KCRQ was still convenient to San Diego.

Visiting San Diego

We found our hotel by searching on tripadvisor.com and clicking the best deals button. We ended up at the Best Western Island Palms Hotel on Shelter Island ($123/night including taxes); it was very nice!.

Island Palms balcony view

This trip, we visited the San Diego Wild Animal Park and fed the giraffes on the Photo Caravan Tour. The next day was San Diego Zoo. Then we visited the La Jolla seals. Then Cabrillo National Monument. Then it was time to head home. The highlights of the trip were feeding the giraffes and the pandas.

San Diego Wild Animal Park Photo Caravan

San Diego Zoo Panda

Coming Back: Day 1

Snowy weather was in the mountains of Colorado and expected to stay there for a while, so we plotted our path towards the Albuquerque/Santa Fe area. This works well when the mountains are snowed in.


I filed IFR to get out even though it was clear. I ended up receiving this clearance: kcrq-ocn-jli-shadi-blh-v16-pxr-kffz. I did not quite fly to OCN at the beginning and Luke AFB approach sent me on the 100° radial of the BXK VOR. So in the end I flew this path between KCRQ and KFFZ.

Falcon Field (KFFZ)in Phoenix has cheap fuel and good food. We ate at the Anzio Landing Italian restaurant on the field like we did last year, and it was very good again. We did the self serve gas and that worked well too.

Our last path for this day was a straight shot to Santa Fe: kffz-ksaf. There was clouds, nearby snow, and wind at Santa Fe when we left Phoenix, but it cleared out about a 1/2 hour before we got there. This took some planning and required some backup plans.

Santa Fe Air Center FBO in Santa Fe (KSAF) was very nice and helped us with parking and a hotel. In the end, we bought fuel at the self serve pumps on the other side of the tower, but this was fine with them and did not change the service. We stayed at Courtyard Marriot for $75 using the FBO. It has an indoor pool and some restaurants near by and a shuttle back and forth to the airport. It was a ways from downtown, but we heard there was a bus that went into town. We might have to come back to Santa Fe again and try this.

Coming Back: Day 2

Our last part back was approximately ksaf-1v8-larks-klmo, but stayed east of the course along the west side of sangre de cristos then over hayden pass.

Possible Return Path Next Time

There is another similar return path I want to possibly try next time. Phoenix and KFFZ is nice, but for something different, we might try Sedona (KSEZ) next time as a lunch break on a southern route. Sedona is beautiful, fuel appears to be reasonably priced, and it appears there is a restaurant on the Sedona field. Maybe we will do a path like this next time between KCRQ and KSAF: kcrq-ocn-jli-trm-pke-ksez-ksaf.

I am not sure how Bagdad 1 MOA between pke and ksez would be if filing IFR if flying Mon-Fri when active. It seems like you could fly below it since the bottom is 7000'MSL or 5000'AGL whichever is higher. But would ATC give it to you since there is no airway and it might depend on the Minimum IFR altitude in that area. You might get the following between KCRQ and KSEZ which is still not too bad: crq-ocn-jli-trm-tnp-jotnu-zelma-eed-drk-sez

Summary

Once again the Colorado to Southern California trip is a winner. A recommended trip if you are in the Colorado area.

/Brian

Sunday, April 4, 2010

Remember AWOS and FBO phone numbers

I just got back from our yearly spring break trek to California from Colorado. It has been a fun destination for us in 2006 to San Diego, 2007 to Carlsbad, 2009 to Disneyland. So hopefully I will have some blogs coming up including a trip report. Here is my track on this year's California trek.

One thing I remembered and used on this trip was the use of AWOS and FBO phone numbers: at the destination and also in between points. On the way back, the weather was mixed. A storm system was moving through, and I wanted to see how it was progressing especially through the mountains of Colorado. You can get some idea from surface charts, METARs, Radar, and Satellite, but more is always good. Here is a past blog post about some of what I check for weather planning a cross country flight.

On the way back from Phoenix to Santa Fe, the weather was changing. In this case, I called the FBO and asked what they saw from the ground. In this case, I heard not only the weather right above the airport which was windy, but that there was snow northeast of the airport. Albuquerque was more clear. By the time I got there the wind was not bad and there was no clouds, but it was nice to know what might be possible so that I could make my backup plans.

From Santa Fe to Longmont, I got the METARs from the Aviation Weather Metar Java site. Along the way, there is Taos (SKX), Alamosa (ALS), La Veta Pass (VTP), Pueblo (PUB), and Colorado Springs (COS). I was wondering about going a little further north from Alamos before crossing over the Sangre De Cristo mountains and there is no METAR for that area. There is however a few airports: Salida (ANK) and Canon City/Fremont County (1V6). Canon City is nice as well since it could indicate if there is clouds just past the divide. Both were clear below 10,000. Just to the west, Monarch pass (MYP) was clouded in.

Having AWOS information before, at the pass, and after the pass is good. I have noticed one time where the pass was clear, but there was a massive buildup of clouds just past the divide for 10 miles. So this time I planned on flying the west side and watching the clouds along the Sangre De Cristo range and look over the edge to see if there was any buildup on the other side. I like flying the windward west side when possible because it is a little less turbulent and will get updrafts if anything. The leeward east side is more turbulent with downdrafts being more consistent.

These AWOS phone numbers are available in the Air Guide Flight Guide, Airnav, and other places. The Colorado Mountain AWOS information is available from the CDOT AWOS web page. http://www.colorado-aeronautics.org/awosphonefreq.htm

So I checked these AWOS phone numbers during my weather briefing and just before starting the engine. I also watched the clouds and had a backup if things did not go as planned. You have to be flexible in the mountains.

Be safe out there and careful in the mountains and questionable weather. Always have a backup plan.

/Brian

Friday, February 26, 2010

Ice Pilots

I just ran into a fun new tv show on flying called Ice Pilots. I first saw Ice Pilots mentioned on an AOPA blog. They also mention another show called R5Sons which is about the Rainy Pass Alaskan lodge that is only accessible by plane.

The Ice Pilots is a show about a cargo plane company in the Northwest Territories, Canada that uses DC-3, DC-4, and C-46 planes. There is an episode or two using a Lockheed Electra as well. It talks about the challenges of running these old planes in the cold ( down to -40C) and the different maintenance problems they encounter (sometimes in the air). It also talks a lot about the copilot wannabees that have to work the ramp before getting the priveledge to sit in the copilot seat. It reminds me of one of my favorite flying books called Moondog's Academy of the Air and Other Disasters by Peter Fusco.

I have been able to find some clips for both shows on YouTube and on the individual tv show sites. I also found out the 13 first season episodes of Ice Pilots are available here. I haven't been able to find the R5Sons anywhere yet, and I don't get the TV channel it is on. I hope both these shows come out on DVD sometime.

Does anybody know where to watch R5Sons?

Does anybody have any other favorite shows?


/Brian

Saturday, January 16, 2010

Elevator Trim Slack Repair

This year, my extra maintenance cost for my Cessna 182 was a fix to the Elevator Trim Actuator. If you have a problem here, this article will hopefully be interesting directly. If not, hopefully it will be interesting in how I describe my thought process on working through the problem and repair.

The problem

This problem is not catastrophic and develops over time. It is noticed by checking the slack in the elevator trim at the elevator. It is something we all do during preflight; wiggle the trim portion by the elevator. Well, mine moved more than desired if a small amount of pressure was applied. It kind of clicked between two extremes. It was within tolerance last year, but this year it needed to be fixed. By the way, this problem is not noticed inside the plane at all. The problem in my case was with the actuator inside the horizontal stabilizer which a linkage attaches to. The actuator changes the direction of movement and translates a cable/chain movement to moving the linkage connected to the trim.

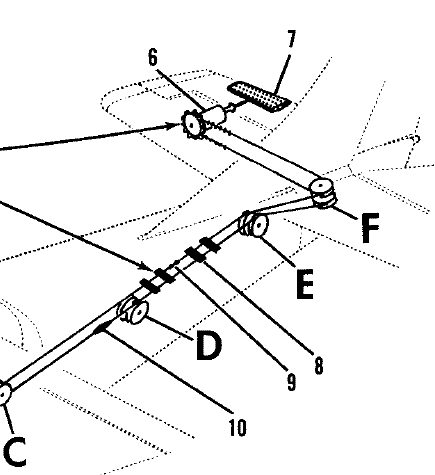
Here is a picture of how the cables make it back to the actuator. The actuator is labeled 6.

Elevator Trim connections

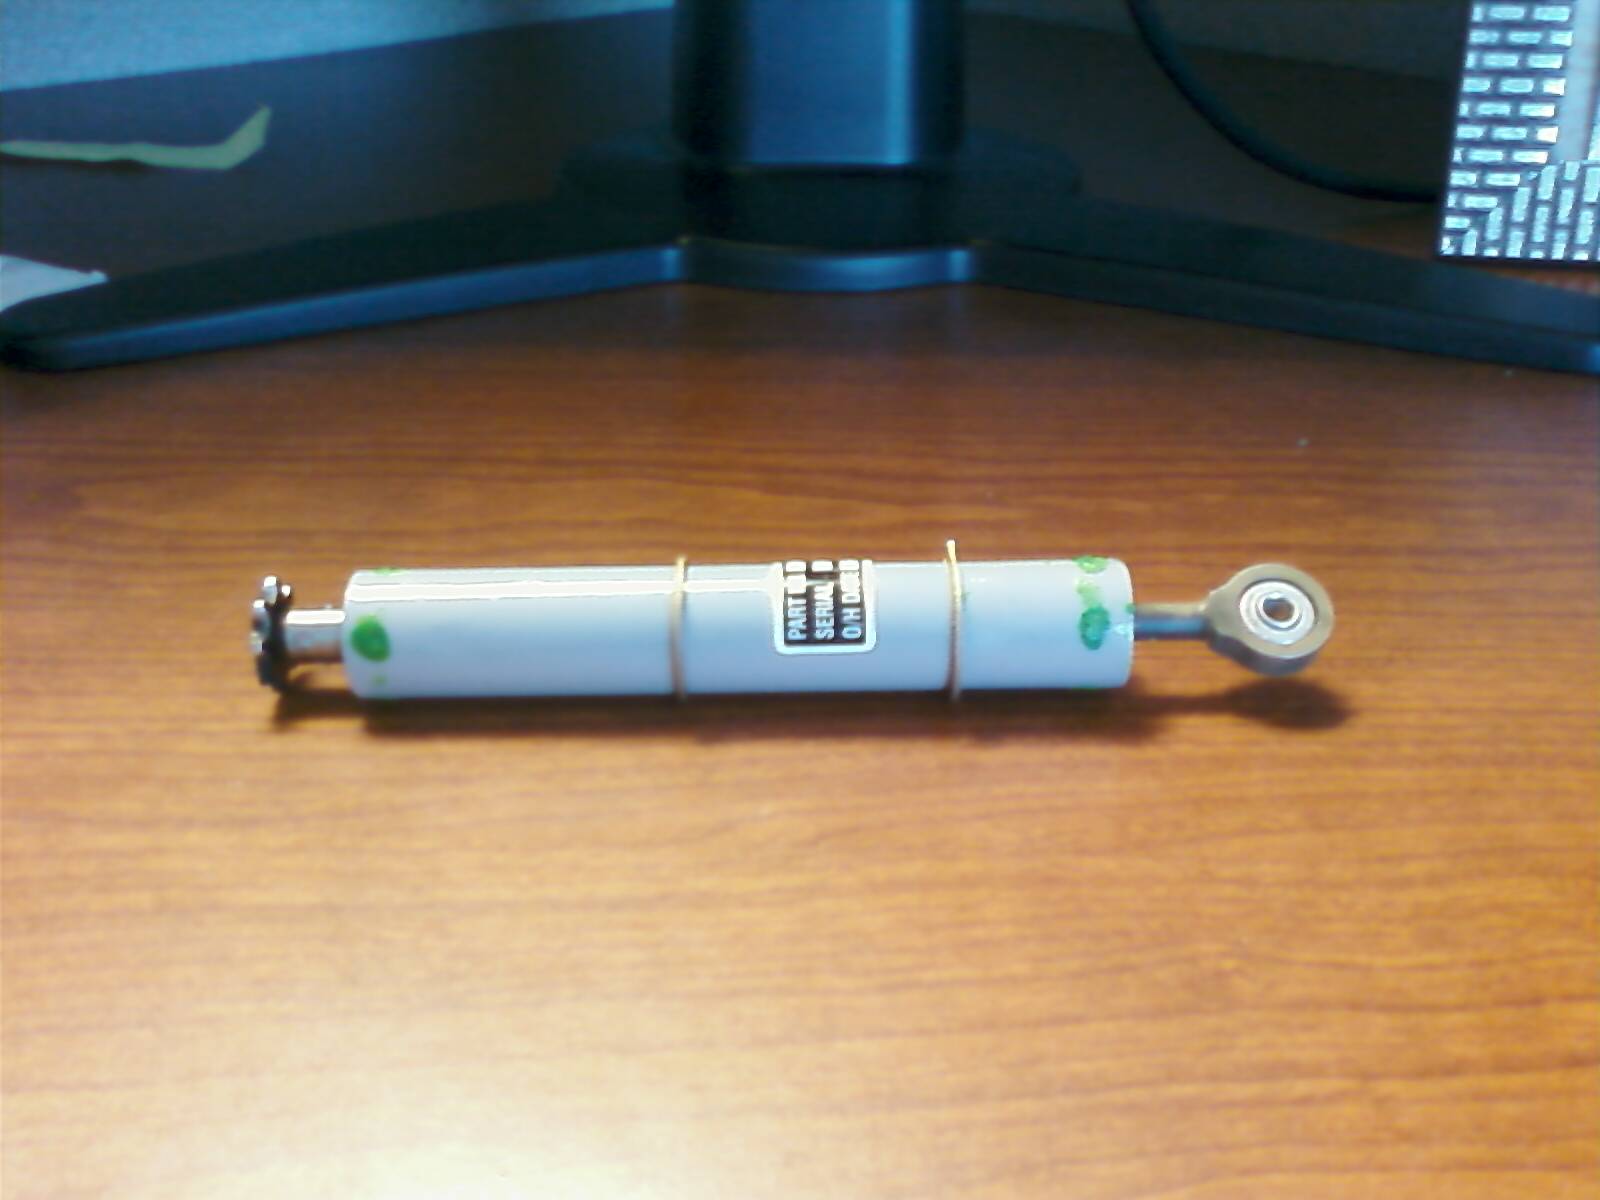
Here is a picture of the overhauled actuator which was eventually installed inside the horizontal stabilizer:

Elevator Trim Actuator

How to solve it?
  • Start with A&P
  • Read Service Manual and Parts Manual
  • Check with Cessna Pilots Association or Mike Busch from Savvy Owner Seminars
  • Check with A&P again
  • Try to find parts or documentation myself
  • Discuss and work with A&P to finish the repair (help where possible)

Start with A&P

First step was to talk with the A&P about it. He mentioned that it was probably the actuator and was going to be expensive to fix. Like $1500+... Ouch! But these large expenses seem to happen when you own a plane, and hopefully more than one problem does not happen in one year. I talk about some of my past operating expenses here and past thoughts on general plane maintenance here. This year during the annual it was time for this one. We looked up inside the elevator inspection port and confirmed the actuator was where the slack was occuring.

Read Service Manual and Parts Manual

I think it is valuable to look through and try to understand the repair myself. I am an engineer and also like mechanical things, so it is not too bad. I often do not understand it completely, but I get the general idea.

You can get some on-line parts and service manuals for free here. If your year is not available here, I would still suggest getting the manuals. When I got my manual pdfs, I did not know about the free manual website, so I purchased my parts manual from McCurtain Technology Group. The PDFs or CDROM of the PDFs are around $20 which seems reasonable. I also got my O-470R manual from Continental, but this is more expensive: $80. Maybe that one is not so necessary, but I like having them. I also found MA-4-5 Carburator overhaul instructions on-line and Marvel-Schebler/Facet/Precision Airmotive Carburator Handbook and Troubleshooting techniques PDF for looking at carburator questions.

So I found information on my problem in the parts manual on Page 201D, and my part number is 1260074-1. The area which talks about my problem in the service manual is Page 9-7. It talks about how to check the allowed free play in the system as well removal and installation procedures.

Check with Cessna Pilots Association or Mike Busch

The three main resources I like to use for figuring out complicated or expensive repairs are:

In this case, I started with the CPA member technical support request. If you don't own a Cessna, I am sure there are similar groups to ask for help from. Within a day, I had a good start to figuring out my problem. Evidently, CPA had done an article in the October 2006 issue of the CPA magazine on my problem and how to overhaul the actuator. The magazine is even available on-line to members. $183 in parts and some labor. Perfect!

Check with A&P again

So then I went back to the A&P to discuss what I found. I really like that my A&P appreciates my working with him this way. I think over time I am getting better at digging, and it is saving him time in the end. He can spend his time actually fixing the problem. If I don't get it quite right, I have some ownership in the fix so that makes me feel better too.

So this time, one of the A&Ps remembered doing the actuator overhaul repair in the past and said it was not easy. The key hard part was drilling a hole in a round bearing. It is like drilling a hole off center in a ring made of hardened bearing material. When I saw what was necessary, it did not look easy. Maybe with the right equipment it would be, but without it would be hard. They were willing to do it, but they warned it could be a fair amount of labor time.

Check for new parts

So how much would it be to get a new part, used part, or overhauled part, or repair a part??

Then I start with iWantCessnaParts.com for checking on new aircraft parts. They have a good method for showing if parts are superceded by another part number. They also have good prices as far as new parts go, but mine was $1500. Ouch! Maybe I could get one used, repaired, or have the A&P repair it.

Check for used parts

There is a long list of used parts places available in the Cessna Pilots Association member section.

It was also possible to find used parts on-line with these two methods:

I found it for $250, but getting a used one could have a similar problem as the one I am replacing, or it could be somewhere in between for tolerance. So there is some risk there. I think you check with them and send it back if it is not acceptable, but you do incur the shipping costs.

I also asked on the CPA forums for advice on the trim actuator, and people mentioned getting the actuator through eBay and possibly getting an overhauled or repaired part.

Checking on Repaired or Overhauled parts

The Aviation Group was mentioned for getting an overhauled elevator trim actuator. It appears that actuators are their specialty. I mentioned the part number and they could get me one for $450 plus shipping and return of my core including the 8130-3 approval form. Not bad... I also found Robair Repair and they could do the repair for $500. When I had to replace my spinner bulkhead at my last annual, a repaired part worked well.

So I decided to head this route. It was similar price to if my A&P did it, but it was by somebody very familiar with doing the work, and it was a guaranteed price.

Finish up with the A&P

Now it was time to finish up. A plan was in place. I had the A&P finish taking out the actuator, I ordered the part from The Aviation Group, and watched things come together. I didn't swing any of the wrenches for this repair since it wasn't an owner maintenance item, but I watched it at many steps. This is the way I like to work and my A&P is ok with this as well as owner obtained parts.

Summary

In the end, I saved quite a bit over a new part and ended up with what I think is the best solution. It did take a bit of time, but I understand my plane better and understand the expense better. I think it falls in line with the concepts I learned at the Savvy Aviators Seminar. If you don't have time for this kind of watchful eye, I think Savvy Aircraft Maintenance Management might be a good idea. I haven't tried it, but it sounds interesting for people without the time or interest in understanding maintenance.

/Brian

Friday, January 15, 2010

States Travelled maps

Sometimes it is fun to look back and see what places and states you have flown your airplane to. I have used two different methods to look back in time.

This is also the time of year that I start thinking about long flying trips for the rest of the year. These maps can help me think of new places to fly and help me remember some of my old favorites.

OurAirports.com is a site dedicated to aviation and actually has the ability to list comments on airports. It can also be used for people traveling as passengers in airplanes.

Here is my map from this website:


Here is another more generic site for generating a map of states that you have been.

Here is my map using this method:
States Flown to

For me, it is definitely a little bit lopsided near where I live. Lots of places left to explore, especially in the East and Northwest.

/Brian

Monday, December 14, 2009

My Pilot Mnemonics and Acronyms

Mnemonics are general lists of items that are good to remember and memorize from airplane checklists and FARs. Over time, I am liking these flying mnemonics more and more. There is so much to remember when flying IFR or VFR in all the different phases of flight. These items make this easier. The key is to use them though. If you learn them once and don't use them, you forget them. During an emergency or other critical times, it is important to know them quickly.

So I thought I would write down all the different mnemonics that I remember using through my pilot training. That way I will have them in one place that I can review occasionally. I have also put them at the end of my personalized checklist.

My description, list, and meanings may be slightly different that yours. The important part is that it works for you and gets you to memorize easier the things you need.

VFR Mnemonics

ARROW (Inside the Airplane)
air worthiness, registration, radio certificate (only outside US now), owners manual, weight/balance

TOMATOFLAMES (VFR equipment)
tach, oil press, manifold press, altimeter, temp, oil pressure, fuel guage, landing gear position, air speed, magnetic compass, elt, seat belts

FLAPS (night time equipment)
fuses, landing light (if for hire), anticollision lights, position lights, source of electricity

IMSAFE (Health preflight)
illness, medication, stress, alcohol, fatigue, eating

RAWFAT (preflight requirements)
runway lengths, alternates, weather, fuel requirement, atc delays, takeoff/landing distance data

CIGAR (Runup before takeoff)
controls, instruments, gas, attitude (trim and flaps), runup

LCGUMPS
Lights, carb heat/cowl flaps, gas, undercarriage, mixture, prop/power, safety

SLIM (Engine shutdown)
switches, lean, ignition off, master off

ALARMS (Emergency Engine Failure)
airspeed, landing site, air restart, radios, mayday, secure plane

PARE (Spin Recovery)
power, aileron, rudder, elevator

CCCC (Missed approach start)
cram it, clean it, cool it, call it

IFR Mnemonics

GRABCARD (ifr equipment)
generator, radios, attitude indicator, ball, clock, adjustable altimeter, rate of turn indicator, directional gyro

CRAFT (IFR clearances)
cleared to, route, altitude, frequency, transponder

AVEF (IFR route for lost comms)
assigned, vectored, expected, filed

MEA (IFR altitude for lost comms)
minimum, expected, assigned

TTTTT (IFR Holding Patterns)
turn, time, twist, throttle, talk

WRIMTIM (IFR Approach briefing)
weather, radio comms and navs, instruments, missed approach point, time, inbound course, minimum altitude

UNOS (Compass errors)
undershoot north, overshoot south (by lattitude for standard rate turn)

ANDS (Compass errors)
accelerate north, decelerate south


Other Sayings

Lights, Camera (transponder), Action (speeds, flaps)
before taking off on the runway

Cold or Low, Look out below
Going towards a low pressure or cold temperature, altitude is lower than expected.


Checklists

One of the other things I really like to do is to customize my checklist. I take the one out of the POH, sometimes rearrange a little, and add some. I also add information for other avionics on my plane. And I also add general items that I like to have handy on flights such as flight plan order, pirep order, common frequencies, cloud clearances, time conversion, light signals, and other miscellaneous things. I decided to put my list of mnemonics in it now too. I recently got a Sony PRS-505 ereader, so I formatted it for the ereader to take with me. If you would like to see what I did for my customized 1974 Cessna 182 checklist, here is the word document version of my C182P checklist and the pdf version of my C182P checklist.

I think personalizing your own checklist is a great thing to do. Then you can put it in the format that you like the most.

Pilot and Flying Mnemonics on the Web

On the web, I found some other lists of mnemonics.
http://simfliteminnesota.blogspot.com/2007/05/mnemonics-and-acroynms.html
http://scottsasha.com/aviation/acronyms.html
http://www.dauntless-soft.com/products/Freebies/Mnemonics/
http://www.aopa.org/pilot/mnemonics.html

Also some common aviation acronyms
http://www.meriweather.com/fd/def2.html


Summary

Don't get rusty during the winter months. Create some homework for yourself. Go make your own list of mnemonics and your own personalized checklist.

/Brian

Sunday, November 29, 2009

Engine Failure Emergency Practice

I just practiced an emergency engine failure on my last biennial flight review for single engine airplanes. I did it in a way I really liked, and I would recommend it to other pilots to practice.

The Engine Failure Practice Setup

We were south of the airport and supposedly flying on our way back to a practice area north of the airport. We were flying at 7500' MSL which is 2500'AGL for our airport. When we were about to pass over the airport, he pulled my throttle and told me I had an engine failure. He announced to CTAF that we were practicing an engine out from 7500'; there was time for some landings and takeoffs before we landed.

Why This Method is Good

Emergency practice is always good; always make sure you make time to go practice. But one thing that has made me a little uncomfortable is that most of my emergency practice in the past has been in the middle of nowhere, trying to make it to a field, and going to low altitude in some farmer's back yard. I like this new method better.

Having your emergency field be an airport made it so we could take the emergency practice all the way to the ground. If I was short or long, it would be obvious, but still safe even at low altitude. For good practice, he still wanted me to put it down at the beginning of the runway even though it is a relatively long runway.

If something somehow happened for real when the engine was put to idle at low altitude, we would still be safe. There have been accidents where emergency practice turns into real emergency, and what better place to be if the unlikely happens than approaching an airport.

For my commercial certificate, I had to practice and show the power off 180 degree accuracy approach and landing. On the commercial maneuver, the power was pulled to idle abeam the touchdown point. In the emergency practice, the power was pulled at 2500' AGL which had me practice something a little different and closer to a real emergency. I would recommend getting good at the pulling the power on the downwind first before trying 2500' AGL.

The last big reason I like this method of emergency practice: This setup is something that all pilots should feel fairly comfortable with. You don't need an instructor in the plane to feel comfortable. All the low altitude operation is near a real runway with this method.

What to Remember

Remember to practice your favorite acronym during your emergency practice. My favorite for this is ALARMS.
  • Airspeed (Best glide speed)
  • Landing Site (remember to look straight down for sites)
  • Air Restart (carb heat, throttle, mixture, primer, fuel tank switch and indicator, ignition L/R checks, etc)
  • Radio set (7700 on transponder, 121.5 if not talking on another frequency)
  • Mayday
  • Secure (Final flaps, then Electric off, fuel off, mixture off, tighten seat belts, crack the door)
Maneuver so that you end up around 1000' AGL in a downwind abeam your intended touchdown point. This might be S-turns or wide turns or full 360 degree turn, but remember that 360 degree turns take a fair amount of altitude. Since I had to descend 1500' and was not above my downwind entry, I did not do a 360. If I needed to descend 2000' and I was above the downwind, I probably would have done a 360.

Don't put the flaps in until the runway is made. Once you put flaps in, you should not remove them. And remember a C182 will drop fast with flaps in. Remember you can always do a foward slip and remove it as needed. This can be better than flaps in this situation.

Think about the entire emergency procedure on the ground occasionally along with all your other acronyms. Maybe make your own list of your acronyms. If you don't know them quickly, quiz yourself and think of what other acronyms you have forgotten. Here is one site for pilot acronyms. I am still searching for some others. I thought I had found other places in the past. If I can't find a good additional list, maybe I will add a post with some.

/Brian

Thursday, October 15, 2009

Ventubes Replacement Air Vent

The front air vents in my Cessna 182 have been quite annoying, and I think they are for many people. I had heard of these Ventube replacement air vents, and thought it was worth a try since they are pretty inexpensive. So far, they have far surpassed my expectations. So I thought I would write a quick review of my experience.


Ventube Cessna Air Vents
The Ventubes Replacement Front Air Vent are available at this Vantage Plane & Plastics ventube page and also from Aircraft Spruce ventube page for under $100 for a pair. And they work for most models of Cessna single engine aircraft: Cessna 120, 140, 150, 152, 170, 172, 175, 180, 182, 185, 190, 195, 205, 206, 207, 210 thru F, and 305's.

One thing I wondered was what they would look like in my plane. I did not see any pictures of it. So here are a couple pictures.

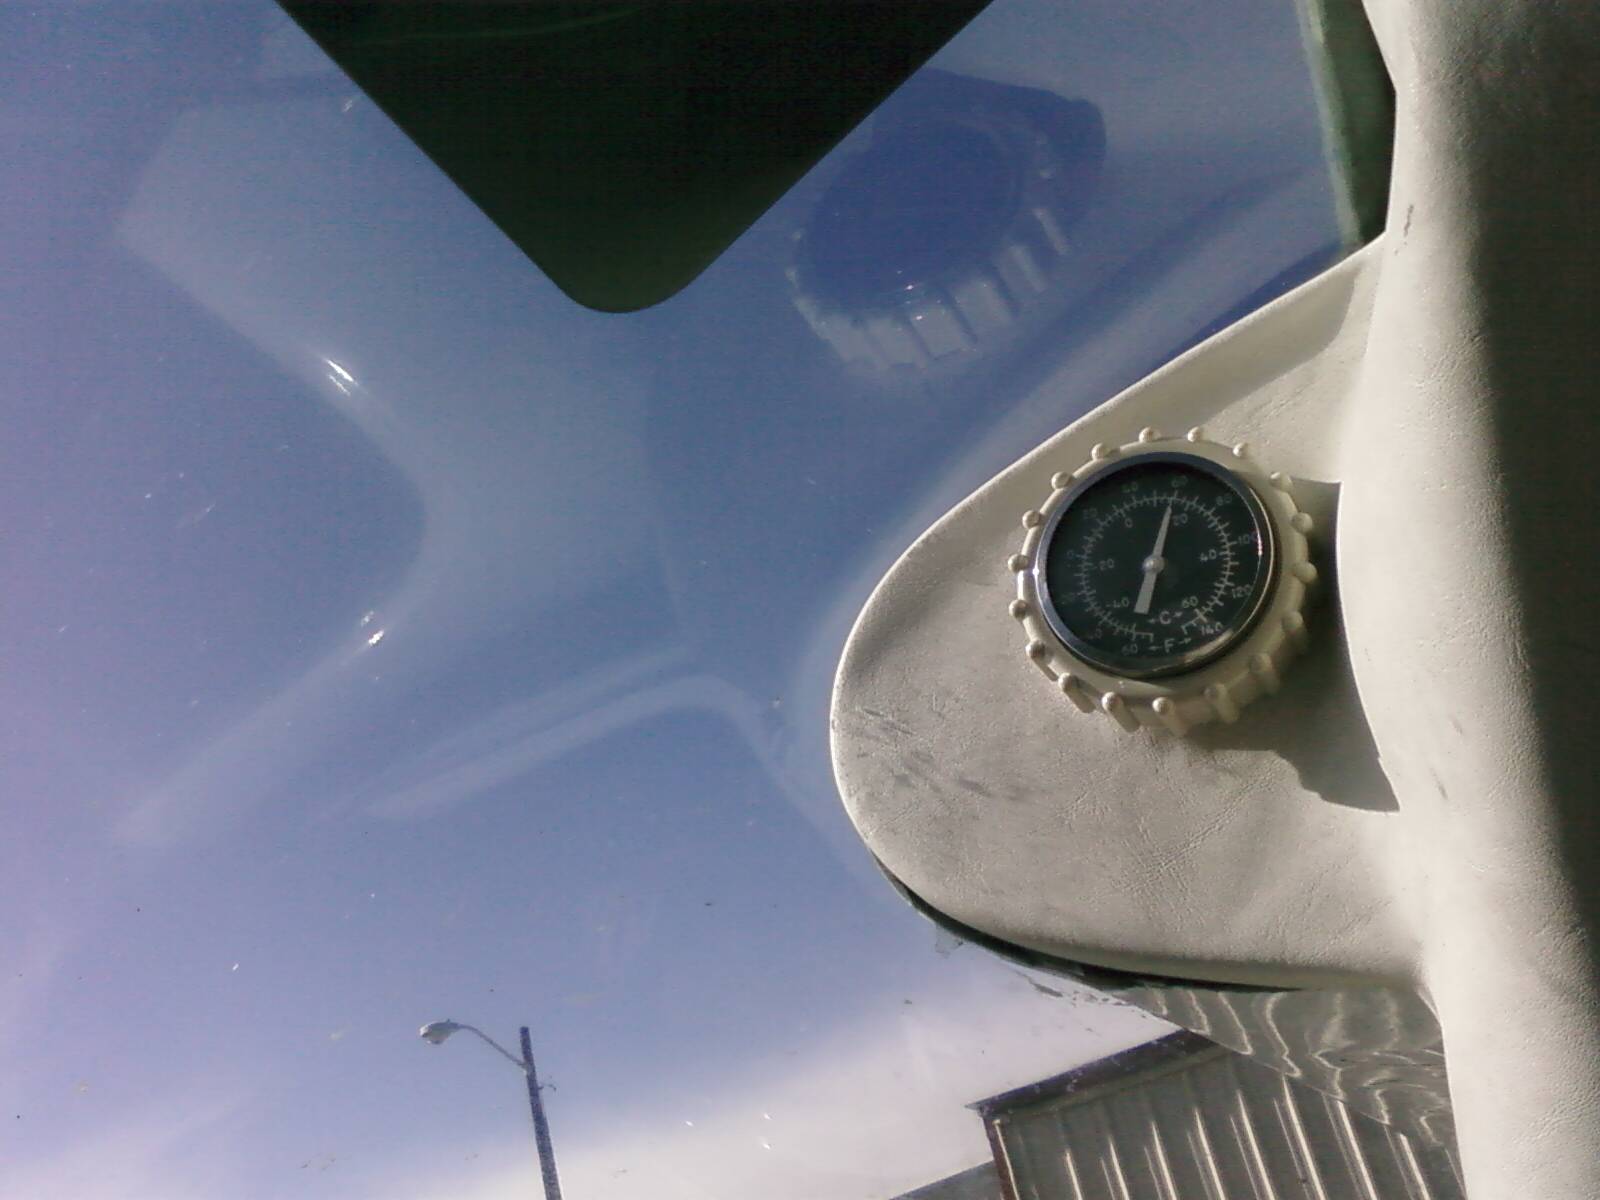
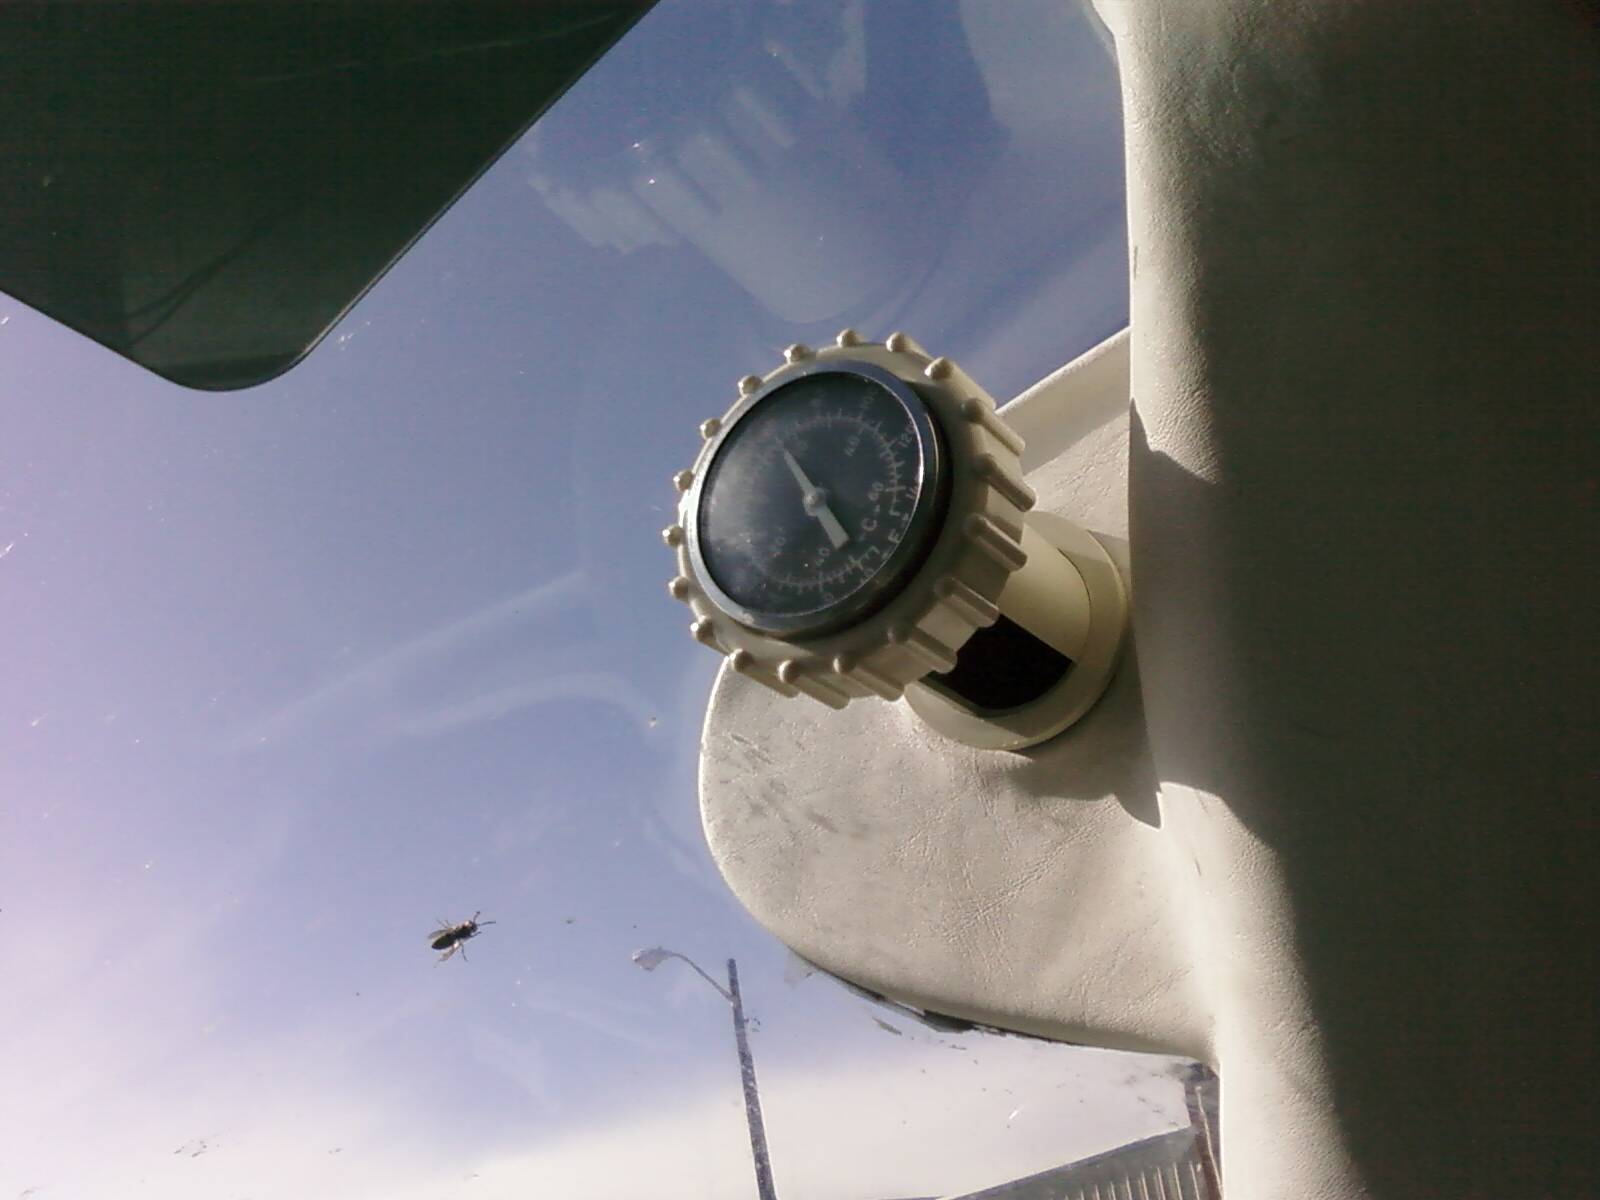
Here is one with it closed and locked. It looks pretty similar to the original except it has the bumps around the side to help twist the outside.

Ventube Cessna Air Vents
Here is a picture with it out and extended. It once again looks pretty similar to the stock one.

Ventube Cessna Air Vents

The big difference in the way this works is in the sleeve that the new vent fits into. The stock vent does not have this sleeve and leaks cold air between the wind screen and the white molding. The molding stops the air flow a bit, but not that well. We had started stuffing paper towels and such to try to improve the leaking air flow with the old vents. The new vent and its sleeve stops the air flow completely. Very nice!

I read the instructions which looked pretty easy, and my A&P put them in. He said it was easy. I had him transfer the temperature probe over from the old vent as well which was simple for him. There is a 337 Form to file for the STC, but that is not too hard for an A&P.

So the plastic ventubes do not look fancy, but they work great and look pretty similar to the original vents. If you have the original stock vents, I highly recommend you get a pair.

/Brian

Friday, September 25, 2009

Aerial Crop Dusting

Every once in a while from the ground or up in the air, I see a crop duster at work. It is pretty amazing to watch. Then lately, I have been hearing how crop dusting or agriculture aerial application industry is doing pretty well and has advanced technically as well. It sounds like for the right person, it could be a good aviation career as an agricultural pilot.

Recent articles

Recently, there has been crop dusting articles in the Wall Street Journal and Associated Press. The Associated Press crop dusting article talks about the industry, and how it has increased recently. Some new sprays have come out for diseases that happen when crops are mature, these are hard to apply from the ground without destroying part of the valuable crop. Perfect for aerial application. In the Wall Street Journal crop dusting article, it also talks about how crop dusting is on the rise and is one of the few jobs a pilot can make decent money. But it really cautions that crop dusting is not for every pilot. This two articles sparked me to find an old AOPA Pilot magazine crop dusting article that I remembered from June 2007. It talks about how the industry has changed quite a bit to using GPS significantly for tracking and accurate spraying as well as using Air Tractor turbine driven turboprop planes or turbine converted older planes. If you can find your old AOPA magazine, I remember some good pictures to go along with the on-line article.

Videos

Pictures and articles don't do cropdusting justice, so I thought I would look on YouTube. Yep, there are some good videos there.


More Good Crop Dusting Information

Digging around a little more, I found an airliners.net article on crop dusting and a little on becoming an ag pilot.

Then I found the most crop dusting information on an association for aerial crop dusting: National Agricultural Aviation Association (NAAA). On the NAAA web site there are multiple articles on becoming an ag pilot and getting a crop dusting job as well as links to FAA publications on crop dusting and other links as well as a convention coming up for crop dusting. Lots of good stuff on the NAAA site.

I also found this crop duster / agricultural pilot information on an aviation career website.

Summary

It is an amazing industry and amazing to watch the pilots doing their job.


/Brian

Sunday, September 13, 2009

Airplane Mixture Leaning

Airplanes have manual leaning adjustments of the mixture for the engine. Every pilot knows about this engine management theory and might briefly discuss it during the private pilot training. But I was talking with my pilot friend the other day, and we both recalled that our introduction to this in our training was not very detailed. It is important to know how to use that red mixture knob during taxi, climb, cruise during a cross country trip, and approach to land.

Things do get a bit confusing since this subject is often debated.

The Controls and Instruments

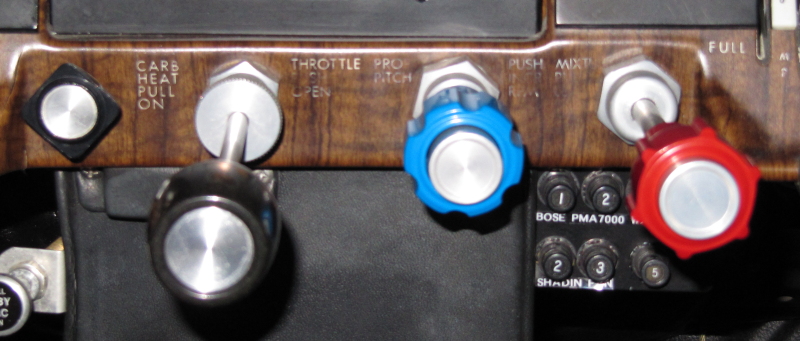
Here are the engine controls in my plane: Carburator Heat, Throttle, Propeller Control, and Mixture.


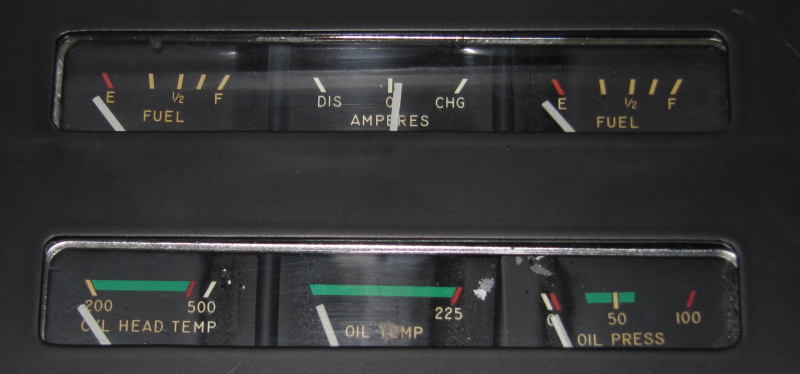
C182 engine controlsHere is the standard C182 Instument cluster containing Cylinder Head Temperature (CHT), Oil Temperature, and Oil Pressure.

C182 engine instruments

Here is a picture of an Exhaust Gas Temperature (EGT) gauge that is sometimes found. This type only shows the temperature at one point instead of separately for each cylinder. The absolute temperatures are not shown since this is not as important as the number of degrees less than the peak EGT temperature. The yellow needle can be adjusted to line up with the peak that is found during leaning checks.

Single Point EGT gaugeHere is a multipoint engine analyzer which shows EGT and CHT for each cylinder. This is very good since different cylinders will be slightly different temperatures during normal operation. That way all cylinders are checked to be appropriate mixtures. Also if a cylinder starts having problems, it will show up here as one cylinder having a larger EGT or CHT difference.
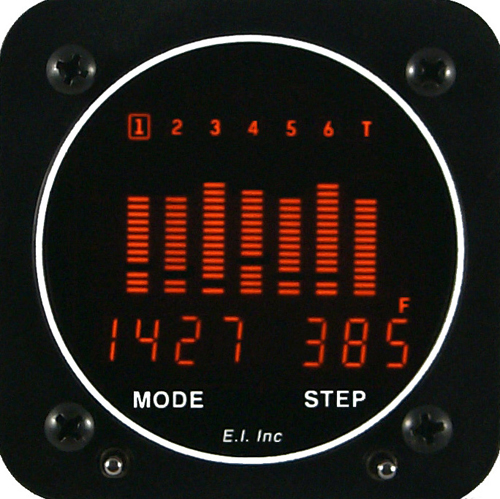
EI UBG-16
In my C182, I pull partial carb heat while cruising so that my carb temperature is 10 degrees C. This makes the EGT differences between cylinders smaller and the engine operates a little better. Fuel injected engines will have even tighter EGT differences due to very even fuel distribution and this is part of why they operate a little more efficiently. If you don't have the carb temperature gauge, do not use partial carb heat; only full carb heat on or off.
C182 carb temp

Why Lean?

Leaning can be important for a number of reasons. It can give you better power and speed at altitude. You need to lean in order to plan your fuel more accurately for long cross country trips; you don't want to run out of fuel, and the performance charts count on you leaning. If you own your own plane, it saves you gas and money.

Operating to rich can lead to fouled spark plugs and then a bad mag check during runup; operating too lean (but not Lean of Peak) can lead to engine problems or reducing the lifetime of an engine.

Running Lean of Peak EGT is a hot point of debate, but it does not work very well in carburated engines like the older C182 so I will not talk about it much here.

How to lean is a choice you have to make. There is a lot to learn as well, and I am still learning/exploring. If you own the plane that is especially important. If you rent, you should probably use the owner/instructors recommendation.

Web Articles

I have been looking over the web extensively and trying to find articles that both describe how to run the mixture and the physics behind it. The best articles I think I have found are John Deakin's old Avweb Pelican's Perch articles. They talk a lot about engine operation and base it on physics. Much of it sounds like it follows what is taught at Advanced Pilot Seminars for engine management. He talks a lot about Lean of Peak, but I am trying to grab the information just on Rich of Peak.

John Deakin's articles:

There is a lot of detail there especially for the engineering minded person.

For pictures of what do do with a single point EGT, this Rod Machado article about leaning is pretty good.

Mike Bush's Savvy Aviator article list on Avweb is excellent for engine management and general airplane maintenance. There are a number of articles there; they basically follow the same principles as John Deakin's articles.

There appears to be quite of maintenance information the Sacramento Sky Ranch knowledge base web site.

I will try to summarize what I have read. See the full web site descriptions for more details.

Leaning for Taxi

Most people follow the recommendation to lean aggressively while taxiing. The idle mixture is set for starting an engine which is much too rich for taxiing. Prolonged taxi with full rich mixture will foul the spark plugs over time.

Mixture for Takeoff

Mixture should be full rich for all but high altitude takeoffs. Throttle should also be pushed full forward for most of the climb since that enables an extra richening feature in many carburators which is important for full power operation. Talk with an instructor for leaning at high altitude; you want to find the climb mixture, but on the ground before takeoff.

Mixture for Climb

When climbing, maintain the EGT that appears at Sea level when full rich or something around 250-300 rich of peak or richer for all cylinders. Most non-turbocharged engines have a peak EGT around 1525-1550, so this will probably be around 1275. Those are some typical numbers; you have to determine them for your engine and EGT probe location.

Leaning for Rich of Peak Operation

During cruise, the EGT setting is found as follows. Lean the mixture 1/2 turn counter clockwise, wait 3-5 seconds, and watch the EGT gauge. It will start going higher. Repeat until you see it go lower. The top temperature is the peak EGT. If you want to be 100 degrees Rich of Peak (ROP), then you want to enrichen the mixture back to the peak, then 1/2 turn clock wise rich, wait and repeat, until the temperature reduces by 100 degrees from the peak temperature.

If you have single point EGT, the above is close to what you want to do. It will only be checking one cylinder, but hopefully the probe is on the leanest cylinder by design. If that is the case, all cylinders will be 100 ROP or richer.

You might want different amounts of ROP depending on the percentage horsepower that your power setting is currently at. A particular Manifold Pressure and RPM setting will yield a particular horsepower that is specified in the POH. Be careful that your RPM gauge is displaying the correct RPM; many are out of adjustment and indicate lower than real. Check it with an optical RPM gauge. If it is wrong, you could be developing more HP than you think and be at the wrong ROP setting.

If you have a multipoint engine analyzer such as one by JPI or Electronic Instuments, there are usually automated ways to do this procedure. You want to do it so that all cylinders are the desired ROP setting or richer.

Lean of Peak (LOP) would be done similar, but all cylinders would be leaner than the peak and the richest cylinder would be leaner than the LOP setting. This is difficult in my carburated C182 engine due to uneven fuel/air distribution from the carburated system, and it is a very debated topic so I will not discuss it now.

The Red Box

Many places either talk directly about a red box or at least the need of not operating too lean while operating at high power settings or not being too lean when Rich of Peak. John Deakin refers to this Red Box description in his Pelican Perch article on Where Should I Run My Engine (Part 3-cruise):
  • At high power at Sea Level, operate full rich and full throttle for extra enrichening. This should place you at 250-300 Rich of Peak (ROP). Anything leaner is bad.
  • At about 80% horsepower, 200ºF ROP to 60ºF LOP is bad.
  • At about 75% horsepower 180ºF ROP to 40ºF LOP is bad.
  • At about 70% horsepower 125ºF ROP to 25ºF LOP is bad.
  • At about 65% horsepower or so, 100ºF ROP to Peak is bad.
  • At and below about 60% horsepower, there is no red box. Put the mixture wherever you want it.
So you would want to make the EGT Rich of Peak setting to be richer than the red box described above for the different power settings.

As the red box is described by John Deakin, it also means that 60% horsepower is a good place to be since any mixture is good. I have heard it is still best to make sure you preferrably don't end up with some cylinders LOP and some ROP. Aim for all cylinders to be all ROP or all LOP.

These cruise mixture settings will end up with richer EGT settings than what is specified in most POHs unless you are 60% hp or lower where any mixture is ok. If you believe John Deakin, Mike Bush, and Advanced Pilot Seminars, this is the way to go. I think it is the way I will aim to put my mixture. If your mixture is richer than the POH specified setting, realize you will burn fuel at a higher GPH rate.

Cylinder Head Temperature (CHT)


Through all these different mixtures, you should try to maintain a CHT lower than what the factory indicates. This will lengthen how long the engine will last and is easily attainable if the baffling and seals around the engine are in decent shape and control the air flow past the cylinder cooling fins appropriately. I try to keep my CHT under 390 degrees and preferrably much cooler. But John Deakin also advises in Pelican Perch to not adjust mixture for this top CHT temperature; adjust mixture with the red box in mind and then make sure it stays below a CHT threshold.

Burned Exhaust Valves

I am searching for articles on burnt exhaust valves as well and have found these interesting articles:
Summary

Once again, it is your choice on how to operate your plane. I am still exploring and learning. Talk with your mechanic, instructor, and others and form your own opinion. There are lots of opinions on this, and they seem to be in flux these days.

Any comments on my interpretations that do not involve Lean of Peak?

/Brian

Saturday, September 5, 2009

Tailwheel Transition

Getting a tailwheel endorsement is a lot of fun. I just finished getting mine in a Citabria. See my earlier post about the Citabria for some pictures of the plane. I always like to keep learning, and I had heard that learning tailwheel will also help your non-tailwheel flying skills. It is also fun and will let me be able to fly a wider range of planes. I dream of flying in a super cub with bush tires some day.

So where to start... First, I picked up a book to hear more of the details, then I took a few initial lessons that combined tailwheel and aerobatics, then recently I focused on finishing up my tailwheel endorsement in a Citabria at Air West Flight Center. They have quite a few instructors that specialize in tailwheel and aerobatics, and I found one I liked there.

So here are my thoughts on the experience just after finishing....

Negative Stability

One of the biggest items to keep in mind is that the tailwheel is negatively stable when on the ground. When trying to slow down, the tailwheel plane wants to flip around since the center of gravity is behind the main wheels; this is especially true if landing incorrectly in a slight crab. If the plane flips all the way around, it is called a ground loop and is very bad. In tricycle gear, the situation is the opposite. In a slight crab while landing a tricycle gear plane, it will tend to correct itself and swerve a little back to the main direction of the momentum. So a tricycle gear pilot needs to be careful of this difference. This same tailwheel negative stability can happen during times other than landing as well. I think I might try to draw some pictures of the forces involved and put this in a separate post. The important thing is do the corrections quickly when they are still needed to be small.

The other item that makes the controls a little different for a tailwheel is the distance between the main wheels and the wheel for steering. The steerable nosewheel is much closer to the main wheels than the steerable tailwheel. The steering mechanism is also more like casters in a tailwheel; the wheel extends out horizontally from where the actual pivot center point is. These effects make the response time to steering input different and delayed. You have to be careful too much change in steering too late does not happen.

Taxi Operations

Forces during taxiing are different and stiffer in general in a tailwheel. If windy, it is harder to turn while facing wind, easier when faced away from wind. The plane will also tend to weathervane and push the tail where the wind is going. Taxi slow.

If you turn sharp, the tailwheel will pop out of the control of the steerable tailwheel rudder pedals. Then it is controlled by the brakes and wind over the rudder itself. Go straight again to have it pop back into standard steerable tailwheel control.

Remember typical wind control while taxiing. Climb into, dive away. But watch out for pushing the stick forward much if using much power; this reduces effectiveness of the tailwheel and can push the nose over if power is used at all. The Compleat Taildragger Pilot book refers to a different taxiing method, but I believe this is for non-steerable tailwheels.

Takeoff

Now for the first challenging part. Push full throttle, but keep stick buried backward initially so the steerable tailwheel is solidly on the ground. Then lift the tail at a certain speed by pushing forward on the stick until the attitude out the front window is correct. I was doing this around 40mph in the Citabria. You can get a little better feel of what is the level attitude when you get up in the air and cruising level; look where the horizon is on the windshield then. Back to our takeoff sequence. We are zooming along at 40mph+ and the tail up. If the attitude is right, the plane will fly off the ground gradually just like tricycle gear. If you hit 60mph+ and it is not, then pull the stick back slightly to let it fly off slowly.

Remember to not forget to lift the tail on takeoff. And lift it fairly quickly on a touch and go, especially if you did not slow down too much. If you do start taking off before lifting the tail, you are flying at a very low speed, so stay in ground effect until good speed is attained.

All that sounds relatively easy, but it does happen fast, and you have to be very good on the rudders through it all. That is what all of us tricycle gear pilots need to get better at. The left turning tendencies are changing constantly, so you have to compensate differently all the time. Be particularly attentive when you raise the tail. If you raise it faster, the turning tendency will change more significantly, and you will need to be more attentive. So raising the tail at a medium speed is easier. Once the tail is in the air, you are then susceptable to crosswind pushing the tail and any gusty winds; so continue to be attentive on the rudders.

Jabbing on the rudder pedals works well; be careful with sustained pushes. The effect of pressing the rudder pedal is a bit delayed and can easily be more than necessary, so a light jab works well.

Another method for learning rudders is happy feet. Try a little left then a little right rudder and watch the plane is in correct position, and continue a little left and right pedal. This prevents you from being lazy from tricycle gear operation and then not do the appropriate correction soon enough. You are already seeing the effects, so you compensate right away with small corrections.
Pattern speeds, flaps, and power settings

As with any new plane, it is good to become familiar with what the different power/speed/flap settings are.

With the Citabria, 70mph worked very well for the initial climb. I let the speed go up a little bit on downwind to maybe 80mph, and then bring it back to 70mph on base and final along with a reduction in the RPM to about 1500 RPM.

I heard that 70mph can work pretty well for the Decathalon too. I remember doing 75mph last time which is roughly the same.

3-point Landings


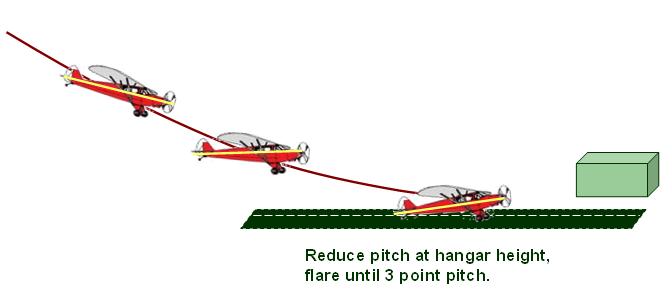
3 point tailwheel landingsA 3-point landing is an attempt to have all three wheels settle onto the runway at the same time right about when the stall horn goes off. This is the most common landing method for people to use in tailwheel trainers like the Citabria.

Make sure you are very well lined up with the runway for any small amount of crosswind. Do a foward slip early and maintain it as the winds change as you get lower. Make sure that you fly the plane in until around stall horn would go off. This makes the landing with a fairly nose high attitude; similar of course to when you are taxiing on the ground.

It helps to get the speed as close to 70mph in the Citabria as you can and trim it. Being too fast, makes the plane float and makes more back pressure needed. If you are at the right speed, you still have to ease the stick back during the flare, but it has less pressure and easier. Trimming, of course, helps your back pressure as well. When you get about the height of hangars, then start leveling out, and then flare when you are at the right height above the runway.

When you get close to touching down, you will have to watch the side of the runway with your peripheral vision in order to stay in the middle. Do not get off center from the runway and correct any difference right away. Light jabs on the rudder pedals is best; don't keep sustained pressure. The effect of pressing the rudder pedal is a bit delayed and can easily be more than necessary, so a light jab works best.

If you are not nose high enough in a 3 point at landing, the mains touch, the tail goes down from the weight behind the main wheels, angle of attack goes up, and airplane starts flying again. It looks like a bounce, but it is not from bouncing off the main wheels and is from the airplane flying again. Sometimes it is called a jounce instead because it is different. In tricycle gear, if you touch down a little early, the nose goes down from the weight being in front of the main wheels, angle of attack goes down, and the airplane stops flying. Of course if you touch down way too early in tricycle gear, you can bounce, but this would be even more severe in a tailwheel.

If the tailwheel hits a little before the main wheels this is ok, but don't make it too much before. Having the tailwheel hit slightly first is better than having the mains hit first to prevent the jounce.

Bury the stick backward once tailwheel is on the ground so the steerable tailwheel works well. Do not relax the stick to neutral or push it forward after landing.

Don't slam on the brakes after landing at least in the beginning; this will make it harder to slow down in a controlled manner; it will accent the negative stability. Keep attentive to the rudders all the time until stopped.

One thing I noticed was that the Citabria/Decathalon sit lower than a C182, so you need to flare with a lower sight picture.

I got a chance to sit the back seat a couple times. This is a little strange for a few reasons. It is hard to see the instruments. Also, when you flare, you feel your part of the plane sink because you are behind the pivot point of the plane. And when you flare, your peripheral vision for runway alignment is even more important since you can see less over the nose of the plane.

Wheel Landings

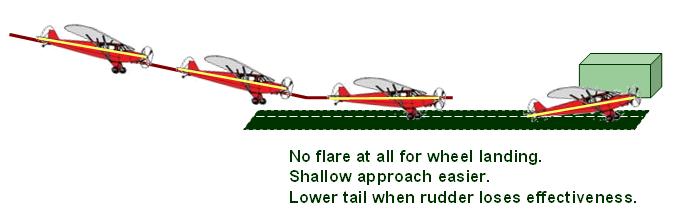
tailwheel wheel landingsA wheel landing is a landing where you attempt to have the main wheels touch first and keep the plane with the tail up while the rudder has effectiveness. Also leave the tail up until the airspeed is below stall speed. That way the plane will not try to take off again when the pitch increases when the tail is lowered.

Here is how we practiced it. Leave a little power (1300-1500RPM in Citabria), fly a shallower approach at least for starters, get in the flying low over the runway mode, don't let the plane slow down, quickly try to fly exactly level over the runway, but 1-2 feet over, then very very slowly slightly pitch down then level to inch down the runway, when you feel the wheels touch and not bounce, push the stick slightly forward, ease the power back. Bring the tail down after a couple seconds when the rudder is losing effectiveness, then go full stick back.

Flying over the runway is strange especially with enough speed to really keep flying and not flare. Pushing the stick forward is a little strange, but as long as you are slow and power off, this should be fine. Be as close to zero sink rate when initially touching the main wheels down. I flew the final at 70mph and was touching the wheels close to 60mph maybe. If it gets much slower, it tends to bounce.

If the wheel landing ends bounces, convert to a 3 point or go around. Bouncing/jouncing is very easy in the wheel landing. If you land with the slightest descent, the tail goes down, the wing flies again, and you balloon/jounce up. The key is to have the descent rate at something like inches per minute; or you effectively are nudging the plane an inch down at a time until it touches. Once again, it is easy to convert to 3 point or go around. If you convert to a 3 point, it helps to add a little power to re-establish the landing position.

Books and Websites

I looked on Amazon and looked for the best recommended book and asked some people, and ended up getting The Compleat Taildragger Pilot by Harvey S. Plourde. It seemed like a decent book. I reread a few areas after having the lessons and his comments and points about landing and takeoff are pretty good. There are some extra sections on taxiing without steerable tailwheel and landing with crosswind gear that don't apply to me, but they might to some. This other book looks good and cover others aspects of flying. I have not read it yet though. Stick and Rudder: An Explanation of the Art of Flying

I glanced around the web and found this website with taildragger information and this other site with taildragger information. Much of the information is similar between these two sites. I also found this description of landing specifically a Citabria; it is pretty good. Here is yet one more article about tailwheel training.

Summary

I think that getting a tailwheel endorsement is a good thing for pilots to get. It does not take too many hours, is a chance to try something new in flying, and is fun.

If any tailwheel pilots feel I have something a little off or could be described better, please let me know or leave a comment. I am a brand new tailwheel pilot and still comprehending how it all fits together.

/Brian


Wednesday, August 26, 2009

Tailwheel fun in a Citabria

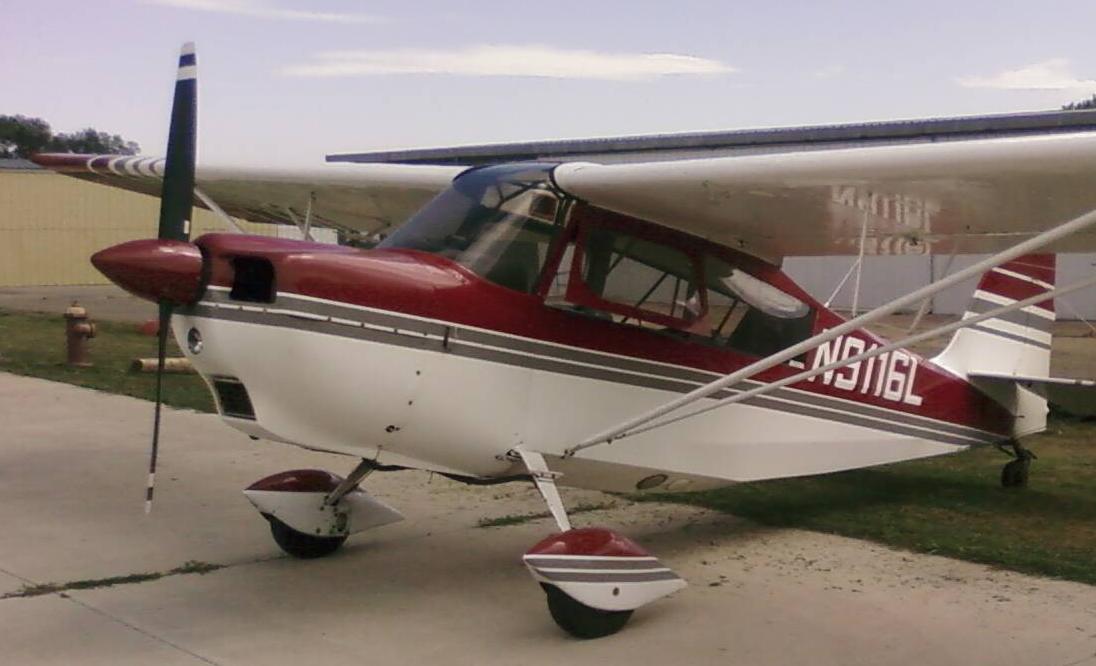
Citabria Lately, I have been having fun trying out tailwheel airplane lessons in a Citabria 7GCBC. I got my first exerience at tailwheel and aerobatics in a Decathalon and Pitts in the spring, and I wrote about that tailwheel aerobatic fun in this post. I always like learning something new each year if possible, and tailwheel is something I have not done yet. It has been fun so far, and it really makes you concentrate on your rudders. My latest lessons focusing on the tailwheel endorsement have been at Air West Flight Center in Longmont (KLMO). They have two Citabrias, one Decathalon, and a number of experienced tailwheel instructors.

One of the things I like to do when going into a new plane is take some pictures if possible. That lets me think through the different items on the ground at home before I get in the air. There are not as many controls in a Citbria as an IFR equipped plane, but I still think it is good. I can imagine all the different parts of a flight and what I would be doing.

Below is the avionics panel for this particular plane. This plane is carburated and has a nice VFR panel. The engine controls from left to right are mixture, prime, and starter. This plane does not have a key for starting, just a button. This model also has manual flaps and if you look closely you can see the flap handle to the left of the left rudder pedal.

Citabria avionics panel
There are some controls on the left side for throttle, carb heat, and elevator trim. At the bottom of the picture near the red placard is the fuel control valve (down is on).

Citabria Left Controls


Up high on the left are the switches and circuit breakers. Since this plane does not have a key for starting and the mags, the mag swithes are up here as well. One for left and one for right.


Citabria Left Switches


Up by the wing roots inside, there is a fuel tank level, but it is only for one wing. So it is important to check the fuel manually in each tank.

For operations here in Longmont, 70 mph is a good number to remember. 70 mph works well for the initial climb after takeoff and the base and final legs during landing. 1500 RPM for the base and final legs seems to work pretty well for a power setting. I raise the tail when there is enough speed, and it seems to be around 40 mph. Takeoff is around 60 mph. There is a lot more to the tailwheel transition, but I think I will leave that to a follow on post after I get my endorsement. It should be soon.

I found these two checklists on the web that seem pretty decent: a fuel injected 7KCAB checklist and a carburated 7ECA checklist.

From what I remember, much of the Citabria was similar to the Decathalon I flew earlier. The Decathalon had a more powerful engine, a constant speed prop, and descended quicker due to a symmetric airfoil (it is not flat on the bottom for more intense aerobatic work), but overall pretty similar.

Lots of other details to think about concerning the aircraft, but that is some quick pictures and information. See the POH for lots more info.

/Brian